How to Add Weather Widget to Any Platform? A Complete Guide for Beginners
How to add a weather widget to Wix, Google Sites, Notion, or any platform? This guide will show you step by step how to add a weather widget to any platform.
With just a few simple steps, you can display current weather conditions and forecasts right on your site. If you're still deciding which widget to use, start with our overview of the best weather widgets for websites to compare your options. Keep reading.

Guide to add a weather widget to any platform
Why do weather widgets matter?
Weather widgets are essential because they transform static websites into dynamic, user-focused platforms by delivering real-time, location-based insights.
On CMS and e-commerce platforms, they enhance product relevance and help users make informed purchasing decisions based on weather conditions.
For website builders and no-code platforms, widgets provide an easy way to enrich content, improve user experience, and increase engagement without technical complexity.
Meanwhile, in developer environments and modern frameworks, weather widgets enable deeper customization and seamless integration into advanced applications.
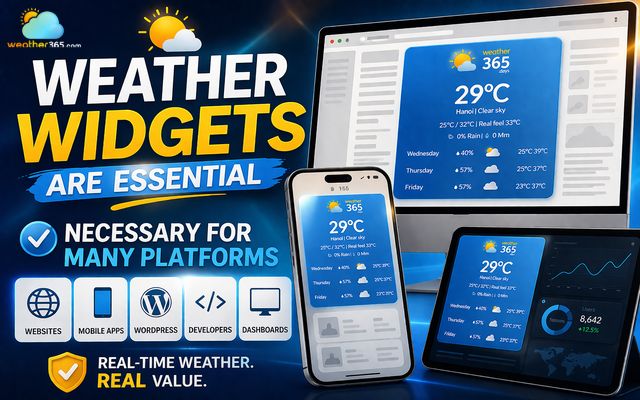
Weather widgets are necessary for many platforms
Across all platforms, adding a weather widget not only boosts usability and retention but also adds practical value that keeps users coming back.
Not sure which weather widget features matter most for your site? Check our feature comparison before you choose.
Now, let's walk through how to add a weather widget to each platform type.
How to add Weather Widget on CMS & E-commerce Platforms
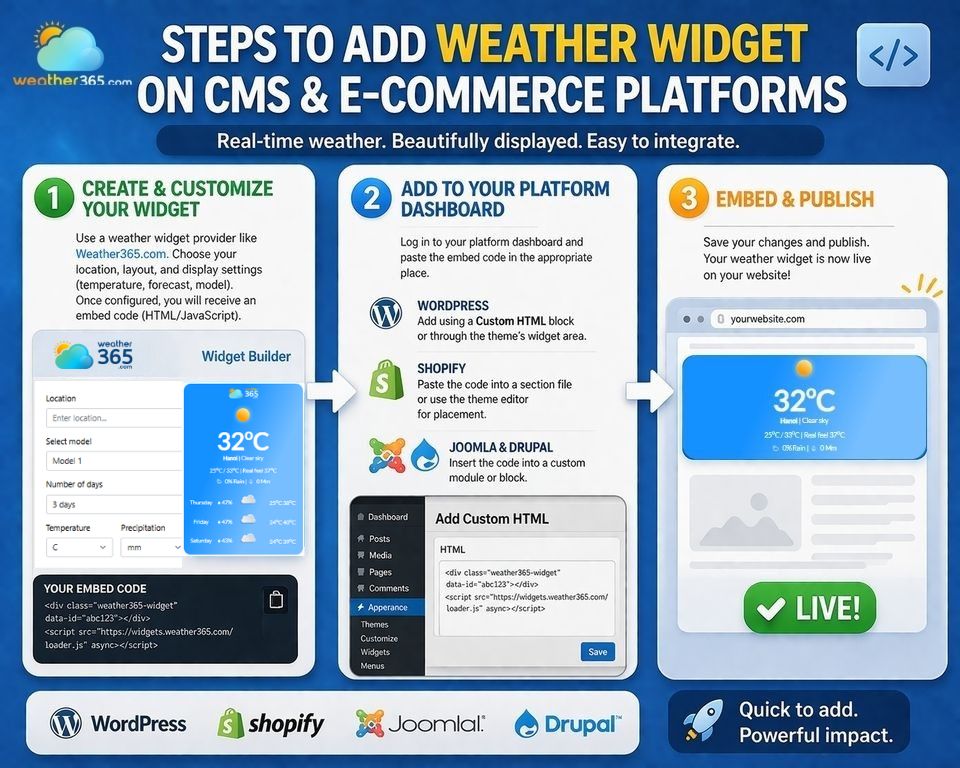
Adding a weather widget to CMS & e-commerce platforms is a straightforward way to enhance functionality and user engagement.
Whether you're using WordPress, Shopify, or Joomla & Drupal, the process typically follows a simple structure that requires minimal technical effort.
First, create and customize your widget using a weather widget provider like Weather365.com.
Choose your preferred location, layout, and display settings (temperature, forecast, model). Once configured, you will receive an embed code (HTML/JavaScript).
Next, log in to your platform dashboard and add the code:
- WordPress: Add the widget using a Custom HTML block in Gutenberg or through the theme's widget area. Read our full weather widget for WordPress guide for detailed steps.
- Shopify: Paste the code into a section file or use the theme editor for placement. See our complete weather widget for Shopify tutorial.
- Joomla & Drupal: Insert the code into a custom HTML module or block. Follow our weather widget for Joomla & Drupal guide for step-by-step instructions.
- Magento & WooCommerce: Use a CMS block or Custom HTML widget to embed the code directly in your store. See our weather widget for Magento & WooCommerce setup guide.
- HubSpot: Add an Embed/HTML module in the HubSpot page editor and paste your widget code. Check our weather widget for HubSpot tutorial.
Finally, embed and publish.
Paste the code into the desired page, product listing, or sidebar, then save and preview.
The widget will instantly display real-time weather data on your site. This same approach also applies to platforms like Magento & WooCommerce and HubSpot, making it easy to integrate weather insights across different CMS environments without complex development.
Adding widget on CMS and E-commerce platforms
How to add Weather Widget on Website Builders & No-Code Platforms
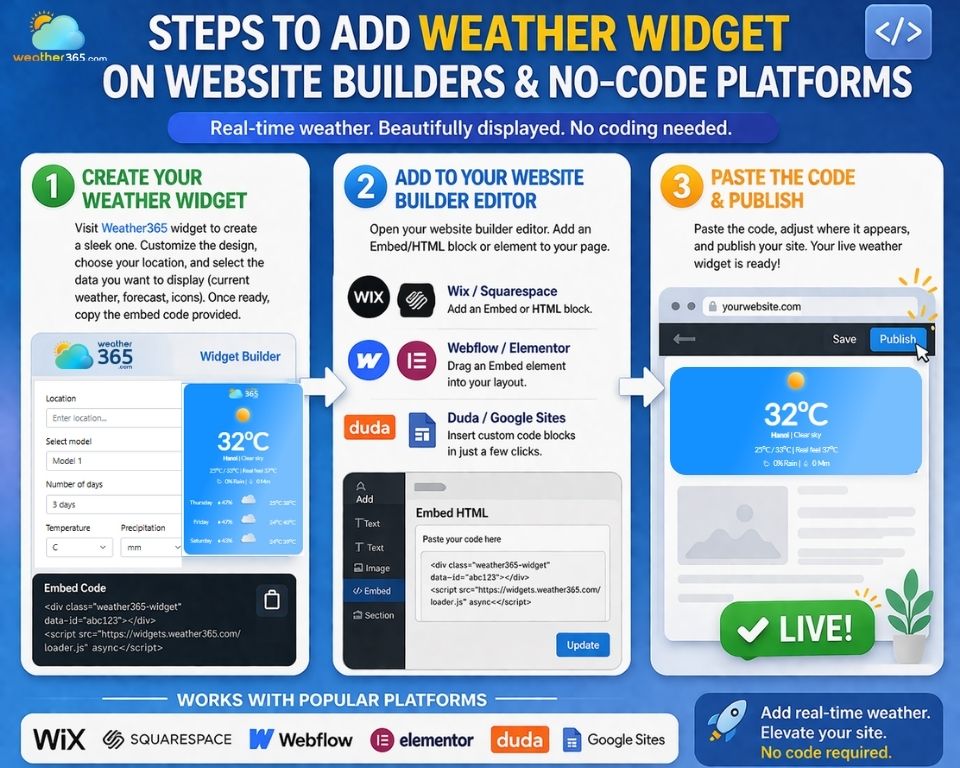
Adding a weather widget to website builders and no-code platforms is one of the easiest ways to enhance your site experience without writing code.
Whether you're using a weather widget for Wix, a weather widget for Squarespace, or a weather widget for Webflow, the process is simple. You do not need to be a technical master, but still do it.
First, create your own weather widget. You can visit Weather365 widget to create a sleek one.
Customize the design, choose your location, and select the data you want to display (current weather, forecast, icons). Once ready, copy the embed code provided.
Next, open your website builder editor. On platforms like Wix or Squarespace, add an Embed/HTML block to your page.
For Webflow or Elementor, drag an Embed element into your layout.
On tools like Duda or Google Sites, you can also insert custom code blocks in just a few clicks.
Visual page builders:
- Weather Widget for Wix — Use the Embed HTML feature in the Wix Editor to add your widget in minutes.
- Weather Widget for Squarespace — Insert your code via a Code Block and adjust the layout for a seamless fit.
- Weather Widget for Webflow — Drag an Embed element into your Webflow project and paste the code.
- Weather Widget for Elementor — Use the HTML widget element inside the Elementor editor for a clean integration.
- Weather Widget for Duda — Add an HTML widget in Duda's drag-and-drop editor and paste your embed code.
Lightweight, hosted builders & blog platforms:
- Weather Widget for Lightweight Builders — Works with Carrd, Tilda, Dorik, Framer, and similar tools via embed elements.
- Weather Widget for Hosted Builders — Ideal for Weebly, GoDaddy, Hostinger, and other managed platforms.
- Weather Widget for Blog Platforms — Add weather to Blogger, Medium-connected sites, or any blog using Custom HTML blocks.
Finally, paste the code and publish your site. Place the widget in high-visibility areas such as the homepage, sidebar, or landing pages.
This same method works across blog platforms, lightweight builders, and hosted builders, making it easy to deliver real-time weather updates, improve user experience, and keep visitors engaged without any coding complexity.
How to add weather widgets on website builders and No-code platforms
How to add Weather Widget on Developers & Modern Frameworks
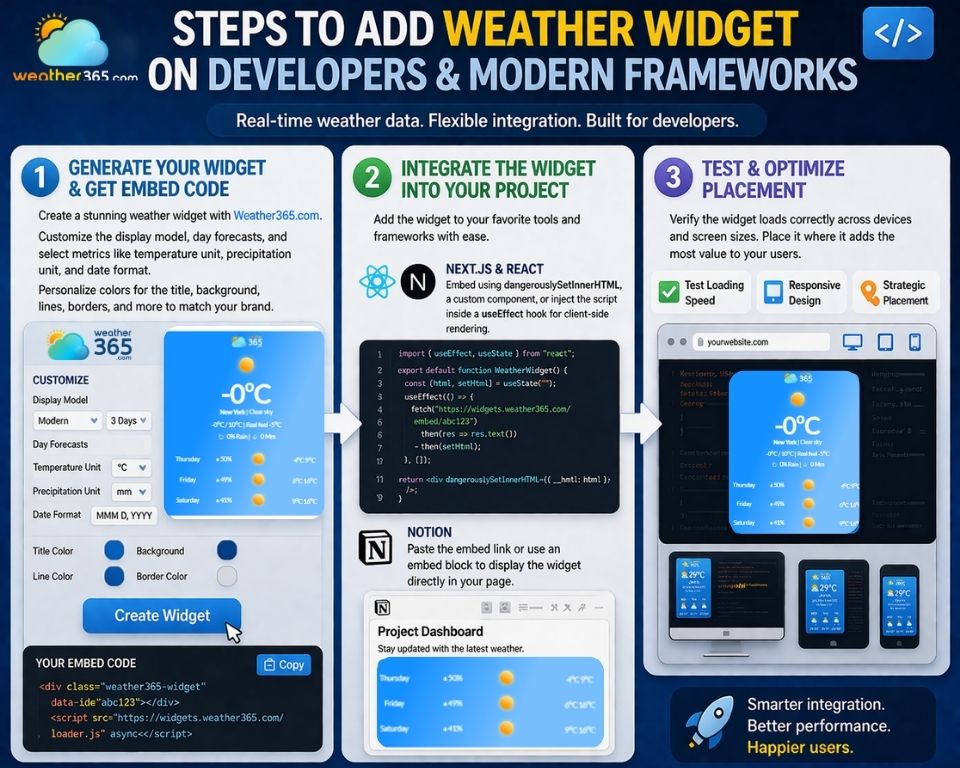
Adding a weather widget to developer tools and modern frameworks gives you greater flexibility and control over how weather data is displayed and integrated.
The approach varies depending on your platform:
- Weather Widget for Next.js & React — Embed the widget using
dangerouslySetInnerHTML, a custom component, or by injecting the script inside auseEffecthook for proper client-side rendering. This ensures the widget loads correctly without affecting server-side performance. - Weather Widget for Notion — Simply type
/embedin Notion, paste the Weather365 embed link, and the widget appears directly within your page. No coding required. - Weather Widget for SharePoint & Google Sites — Use the Embed web part (SharePoint) or Insert → Embed (Google Sites) to paste your widget code and display live weather on internal or public pages.
First, generate your widget and get the embed code from a reputable provider like Weather365.com.
With the Weather365 widget, you can customize the display model, day forecasts, and select metrics display like temperature unit, precipitation unit, and date format.
Besides, you also customize your own widget by choosing the color of the title, background, line, border, etc.
After clicking the "Create widget" button, you’ll receive an HTML/JavaScript snippet or iframe code.
Next, integrate the widget into your project.
For Next.js & React, you can embed the widget using dangerouslySetInnerHTML, a custom component, or by injecting the script inside a useEffect hook for proper client-side rendering. This ensures the widget loads correctly without affecting server-side performance.
For the weather widget on Notion, simply paste the embed link or use an embed block to display the widget directly within your page.
Finally, test and optimize placement. Ensure the widget loads smoothly across devices and place it strategically within dashboards, landing pages, or apps.
By integrating a weather widget into modern frameworks, developers can enhance interactivity, deliver real-time data, and create more dynamic user experiences.
For a visual page builder approach, check out our weather widget for Elementor guide.
For all three approaches, start by generating your widget on Weather365, customize the design, and copy the embed code.
Adding a weather widget to developers and modern frameworks
The bottom line
Through this guide, you now know how to add a weather widget to any platform — from CMS giants like WordPress and Shopify to no-code builders, blog platforms, and even developer frameworks.
Ready to get started? Head to Weather365's widget builder to create your free widget in minutes.
Want to explore more? Check out our full guide on weather widgets for websites to learn about features, use cases, and how different weather widgets by industry can add value to your business.
Related post

Weather Widget for Squarespace: Quick Guide to Display A Live Weather

Weather Widget for Shopify: Must-Have Tool for Any Online Store

Weather Widget for Lightweight Builders: Adding Live Weather Easily

0 Comment
Leave a comment
Your email address will not be published. Required fields are marked *