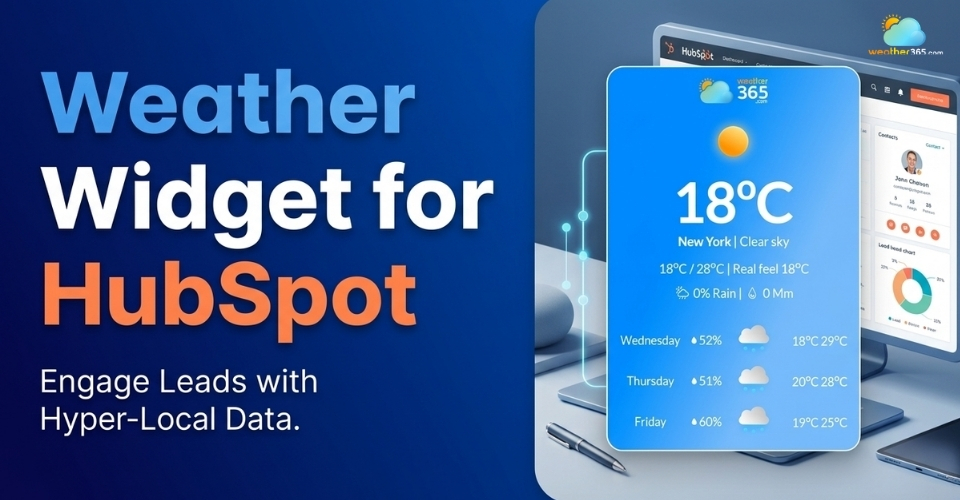
Weather Widget for HubSpot: Add Real-Time Forecast Easily
Weather Widget for HubSpot is often overlooked, yet many websites struggle with low engagement and stale content. If your pages feel lifeless or disconnected from users’ daily needs, a real-time weather widget could be the simple upgrade that makes your site more useful and interactive. Now let’s add one for your site!
Weather widget for HubSpot
Why Adding A Weather Widget for HubSpot
You think a weather widget is just for a live weather show?
It actually can solve several common problems, especially around engagement, relevance, and user experience.
Adding a weather widget for HubSpot may seem like a small detail, but it can significantly improve how users experience your website.
-
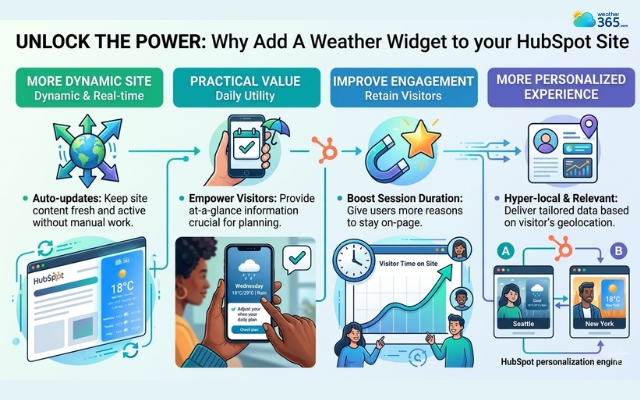
More dynamic site
First, it makes your site feel more dynamic.
Instead of static content, a weather widget brings real-time updates, helping your website look more “alive” and up-to-date without extra effort.
-
Practical value
Second, it adds practical value. Visitors don’t just browse, they look for useful information.
The weather is something people check daily, so embedding it directly on your site gives them a reason to stay longer instead of leaving.
Reasons why you should add a weather widget for HubSpot
-
Improve engagement
It also helps improve engagement.
Even a quick glance at the weather can increase time on page and reduce bounce rates, supporting your overall SEO performance.
You know what, even eCommerce platforms like Shopify use weather data to improve user engagement and encourage purchase decisions.
Learn how to add a weather widget for Shopify!
-
More personalized experience
Finally, it creates a more personalized experience.
Showing location-based weather makes your content feel more relevant and connected to users’ real-life context, without needing complex customization.
Feature of Weather365 Widget
When choosing a Weather Widget for HubSpot, features matter more than you think.
A good widget should be flexible, accurate, and easy to use. That’s where Weather365 stands out.
-
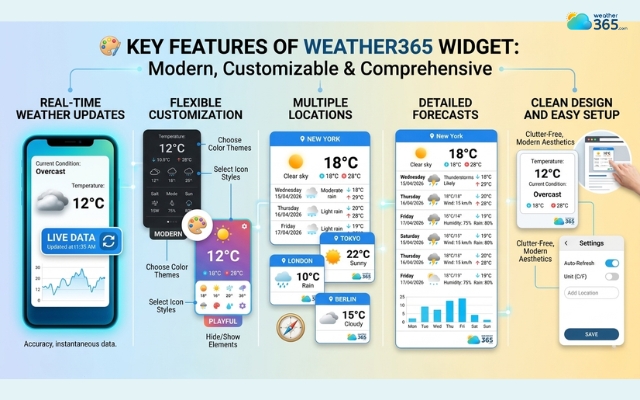
Real-time weather updates
First, it provides real-time weather updates, so your website always shows fresh, reliable data instead of static information. This helps your site feel more dynamic and useful.
-
Flexible customization
Another key advantage is flexible customization.
You can easily adjust location, temperature units, layout, and colors to match your website design, making the widget feel like a natural part of your page.
Features of the Weather365 widget
-
Multiple locations
Weather365 also supports multiple locations, which is ideal if your audience is not limited to one area. This makes your content more relevant to a wider range of users.
-
Detailed forecasts
In addition, the widget offers detailed forecasts, not just temperature, but also rain, wind, humidity, and more. This gives visitors practical information they can actually use.
-
Clean design and easy setup
Finally, it stands out for its clean design and easy setup.
The widget looks modern on both desktop and mobile, and you can embed it into your HubSpot site in just a few minutes.
How To Add Weather365 Widget to HubSpot
Adding a Weather Widget for HubSpot with Weather365 is actually much easier than most people think. You don’t need coding skills, just a few simple steps.
If you’re new to embedding widgets, you can first check our guide on How to Add Weather Widget to Any Platform, which explains the basic steps that apply across most website builders.
Step 1: Create your widget on Weather365
Go to the Weather365 widget page and customize your widget. You can choose:
-
Location
-
Number of forecast days
-
Temperature unit
-
Colors and layout
Once everything looks right, click to generate the embed code and copy it.
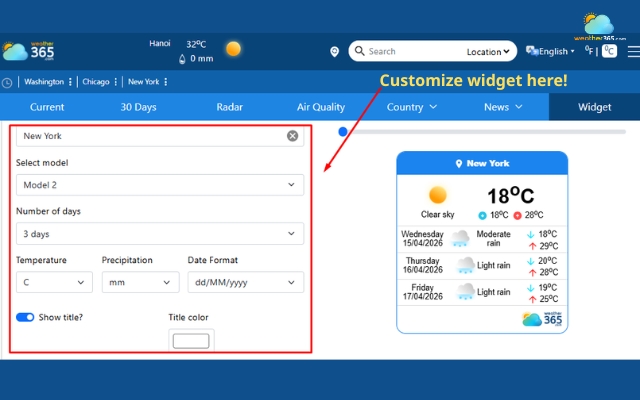
Customize the best weather widget
Step 2: Open your HubSpot page editor
Log in to your HubSpot account, then:
-
Go to Website Pages or Landing Pages
-
Choose the page where you want the widget
-
Click Edit
This is where you control where the widget will show up.
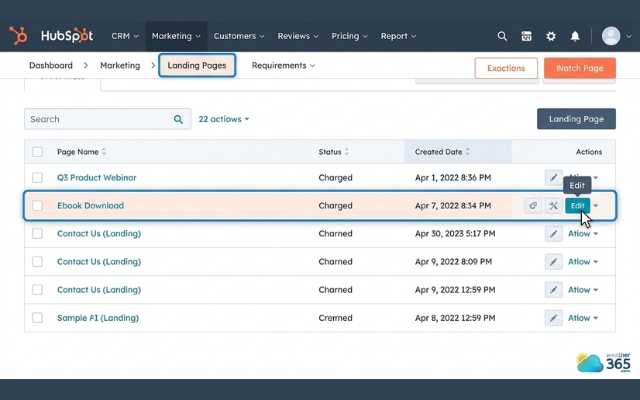
Choose the page where you want the widget
Step 3: Add an Embed/HTML module
Inside the editor:
-
Search for an Embed or HTML module
-
Drag and drop it into your desired position on the page
HubSpot allows you to insert third-party widgets using embedded code blocks like this.
Similarly, Webflow also allows users to easily add custom code blocks into their page layout.
Curious about the benefits of a weather widget for Webflow? Discover how the right weather widget can enhance your website experience. Explore more here!
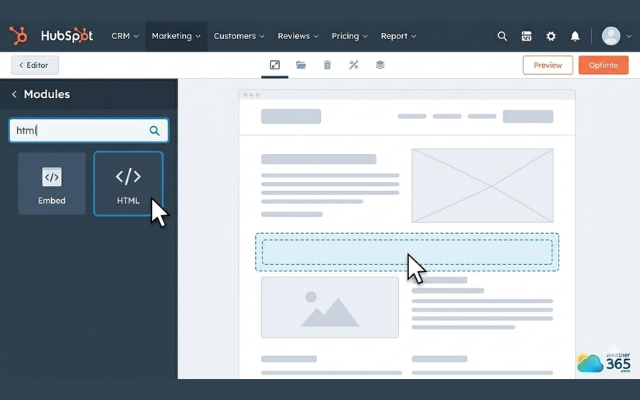
Search for an Embed or HTML module
Step 4: Paste the Weather365 embed code
Click on the module you just added, then:
-
Paste the Weather365 embed code
-
Preview to check how it looks
At this point, your weather widget should already be visible on the page.
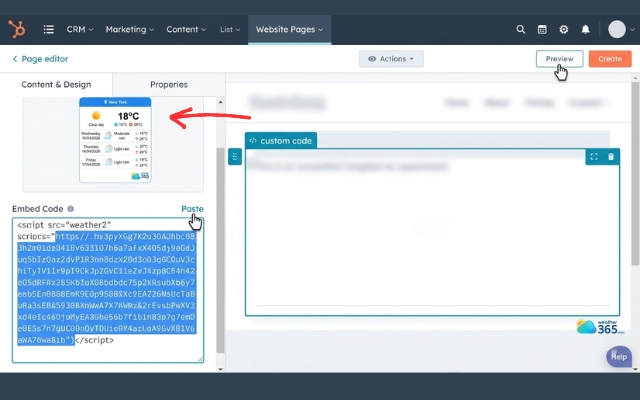
Paste the code and review the widget
Step 5: Publish and test
Finally:
-
Click Publish
-
Open your page on desktop and mobile to make sure everything displays properly
If needed, you can go back and adjust spacing or layout for better responsiveness.
Publish the page and test the weather widget
Final Thought
With this full guide, hope you can add a Weather Widget for HubSpot without overthinking the process. A weather widget can definitely make your site feel more useful and alive. Once it’s in place, you’ll see how a small detail can quietly improve the overall user experience.
Frequently Asked Questions (FAQs)
◉ Weather widgets (real-time forecasts)
◉ Social media widgets (feeds, share buttons)
◉ Contact or chat widgets (live support, forms)
◉ Review widgets (customer testimonials)
◉ Analytics or counter widgets (visitor stats)
Related post

How to Add Weather Widget to Any Platform? A Complete Guide for Beginners

Weather Widget for Next.js & React: How to Add and Customize It Easily

0 Comment
Leave a comment
Your email address will not be published. Required fields are marked *