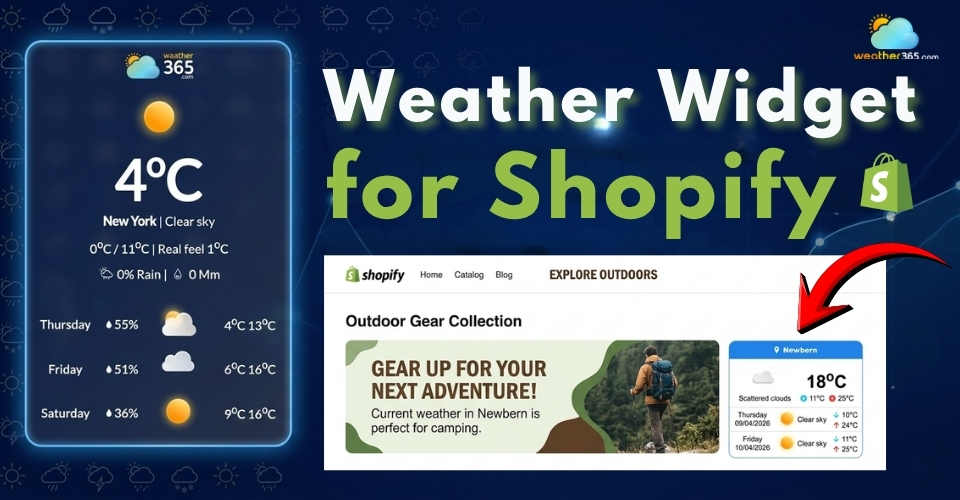
Weather Widget for Shopify: Must-Have Tool for Any Online Store
A weather widget for Shopify might seem like a small detail, but among the many weather widgets for websites available today, this one stands out for good reason. Shoppers today expect personalized experiences. So how can a simple weather feature keep them browsing longer and more interested? Scrolling down to discover the huge benefits of a weather widget, and learn how to add them today!
Weather widget for Shopify
- About Weather365 Widget
- Key Features of Weather365 Widget
- Why It’s a Must-Have for a Store Website
- How To Add A Weather Widget For Shopify
- Step 1: Choose the right weather widget
- Step 2: Customize your widget
- Step 3: Paste the code into Shopify
- Step 4: Choose the right placement
- Step 5: Test and optimize
- Common Mistakes When Adding A Weather Widget
About Weather365 Widget
Weather365 is a weather widget designed specifically for websites, including Shopify stores.
In short, it’s a small feature you can embed into your site to display real-time weather information based on the visitor’s location.
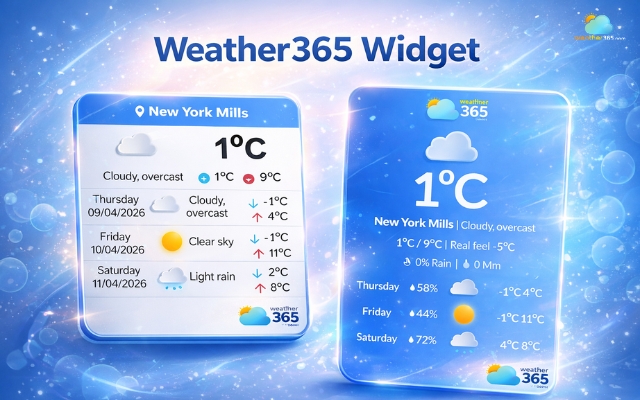
Weather365 widget adds more dynamics to your site
Instead of showing generic content, Weather365 helps your store feel more dynamic and relevant.
For example, a visitor in a rainy city might see rain updates, while someone elsewhere sees sunshine - all automatically.
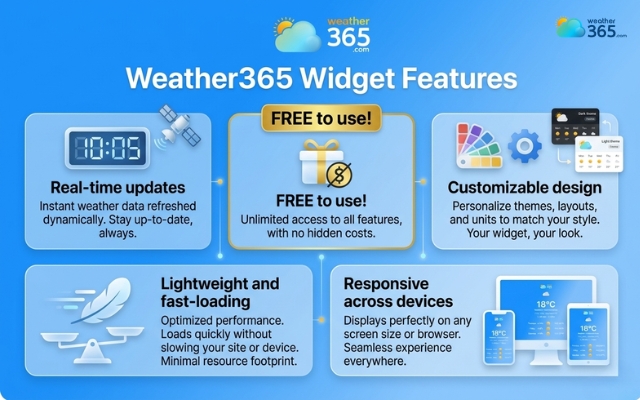
Key Features of Weather365 Widget
What makes Weather365 appealing is not just what it does, but how efficiently it does it. Here are the standout features:
Free to use
One of the biggest advantages is accessibility.
Weather365 offers a TOTALLY FREE version that already covers essential needs, making it ideal for small to medium Shopify stores that want to enhance UX without increasing costs.
Real-time weather updates
The widget continuously updates weather data, ensuring visitors always see accurate, current conditions.
This real-time element adds credibility and usefulness, especially for stores related to fashion, travel, or outdoor products.
Customizable design
Weather365 allows you to adjust colors, layouts, icons, and display styles.
This means you can match the widget with your store’s branding instead of it looking like a random third-party add-on.
Unique features of the Weather365 widget
Lightweight and fast-loading
Speed matters, not just for users but also for SEO.
Weather365 is designed to be lightweight, meaning it won’t slow down your site significantly.
This is crucial because even small delays can increase bounce rates.
Responsive on all devices
With most users shopping on mobile, responsiveness is non-negotiable.
Weather365 adapts smoothly across screen sizes, ensuring the widget looks clean and functions well on phones, tablets, and desktops.
Why It’s a Must-Have for a Store Website
You might think a weather widget seems like a “nice extra.”
But when used correctly, it can solve real problems that many Shopify stores face.
Makes your store feel more personalized
A common issue with online stores is that they feel static and impersonal.
Weather365 introduces location-based content, helping visitors feel like the site is tailored to them, even in a small way.
Improves user engagement
When visitors see interactive, real-time elements, they tend to stay longer.
Even a quick glance at the weather can increase time-on-site, which indirectly supports better conversion potential.

Weather365 widget is must-have ‘item’ in your online store
Supports smarter shopping decisions
Weather can influence buying behavior more than you think. For example:
Cold weather → higher interest in jackets
Rain → increased demand for umbrellas or boots
By displaying weather information, you subtly align your products with the user’s current needs.
Enhances overall user experience (UX)
Good UX can elevate the relevance.
Weather365 adds a layer of contextual information that makes your store feel more helpful and intuitive.
Helps your store stand out
Many Shopify stores look and feel similar.
Adding a well-designed weather widget is a simple way to differentiate your site without overcomplicating it.
Read more:
How To Add A Weather Widget For Shopify
Now that you understand the value of a weather widget, the next question is: how do you actually add one to your Shopify store?
The good news is: it’s much easier than it sounds, even if you’re not technical.
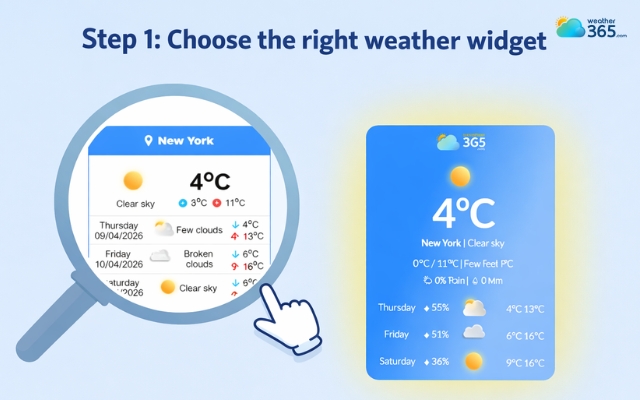
Step 1: Choose the right weather widget
Start by selecting a reliable widget provider like Weather365 widget or other similar tools available.
Don’t just pick the first option; look for key factors like speed, customization options, and user reviews.
A good widget should be lightweight and easy to control.
Choose a reliable weather widget provider
Step 2: Customize your widget
Now let’s ‘decorate’ your weather widget!
With the Weather365 widget, you can customize almost everything to make your weather widget ideal!
Choose location settings (auto-detect or fixed location)
Select temperature units (°C or °F)
Adjust layout, colors, and display style
Remember to keep it simple and aligned with your store’s design.
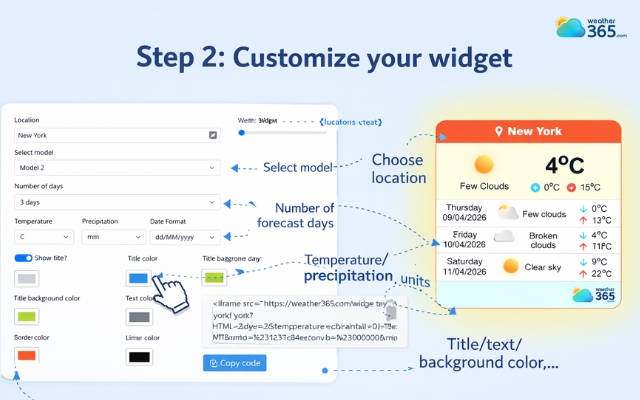
Customize the weather widget to match your needs
Step 3: Paste the code into Shopify
Now go to your Shopify admin dashboard and open the page where you want the widget to appear.
You have a few options here:
Add an HTML/Custom Liquid block in the theme editor
Or open a page/blog post and switch to HTML view, then paste the code
Once pasted, save your changes, and the widget will appear on your site.
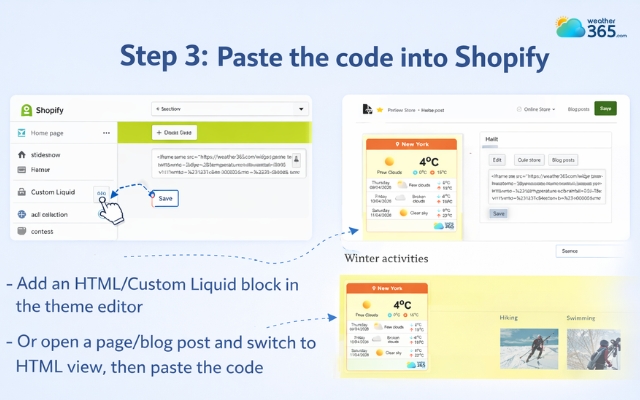
Paste the code into your Shopify
Step 4: Choose the right placement
Where you place the widget matters more than you think. Common positions include:
Homepage (for visibility)
Product pages (for relevance)
Footer (for subtle integration)
The goal is to make it useful, but not distracting.
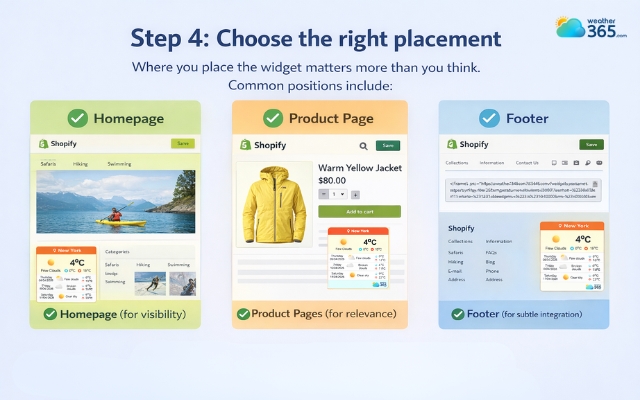
Place the weather widget in a suitable position
Step 5: Test and optimize
Before going live, check how the widget looks on both desktop and mobile.
Make sure it loads quickly, displays correctly, and doesn’t interfere with other elements on your site.
Common Mistakes When Adding A Weather Widget
The guide on how to add weather widget to any platform is easy, but doing it right is what actually makes a difference.
Many store owners install it quickly, then forget to optimize it.
The result? A feature that adds little value, or worse, hurts the user experience.
Here are the most common mistakes you should avoid:
Adding too many widgets at once
Choosing designs that clash with your style
Failing to optimize for smaller screens
Making edits that cause display glitches
Inserting the widget into the wrong section
Using widgets that lag your website
Skipping personalized brand customization
Overlooking tools for users with disabilities
Failing to track the widget's performance
Picking widgets that disrupt the user's focus
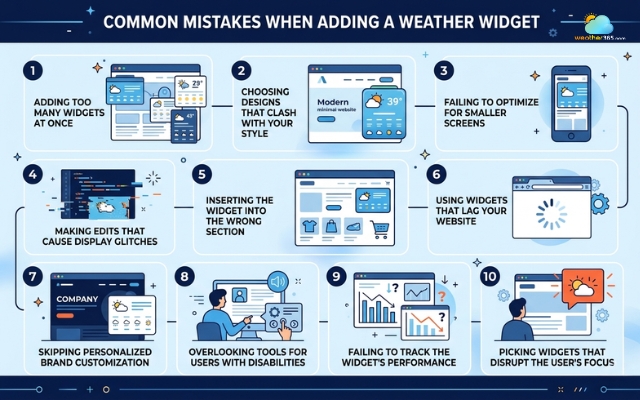
Mistakes to avoid when adding a weather widget for Shopify
Sum up
Can you add a weather widget for Shopify yet? If not, now might be the perfect time to try. Explore more about weather widgets for websites to find the best solution for your business. It’s a simple addition, but when done right, it helps your store feel more dynamic and connected to your visitors.
Frequently Asked Questions (FAQs)
Related post

How to Add Weather Widget for WordPress? A Step-by-step Guide

How to Add Weather Widget to Any Platform? A Complete Guide for Beginners

0 Comment
Leave a comment
Your email address will not be published. Required fields are marked *