Weather Widget for Wix: How To Add Live Weather In Minutes
What if a simple weather widget for Wix could instantly make your site more useful and engaging? Among the many weather widgets for websites available today, Wix stands out as one of the easiest platforms to integrate live weather data. Whether you run a blog, travel page, or local business site, adding real-time weather updates is easier than you think — and this guide will show you exactly how to do it in minutes. Diving in!
Weather widget for Wix
- Why Add a Weather Widget To a Wix site?
- Features of Weather365 Widget
- How To Add Weather Widget for Wix
- Step 1: Create and Customize Your Widget
- Step 2: Copy the Embed Code
- Step 3: Add an HTML Embed Element in Wix
- Step 4: Paste the Code and Apply
- Step 5: Adjust Size, Position, and Mobile View
- Step 6: Publish Your Site
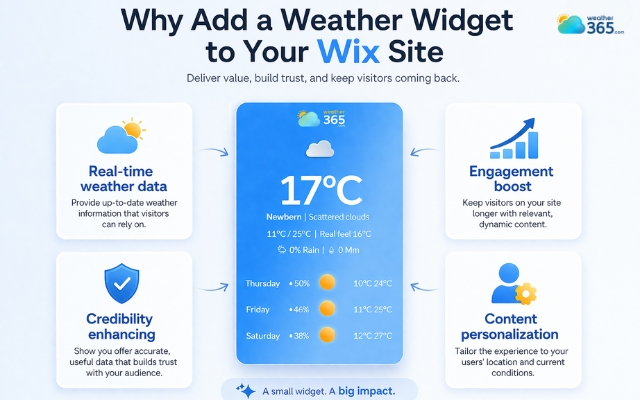
Why Add a Weather Widget To a Wix site?
No kidding! A weather widget can truly make a surprisingly big difference in how users interact with your site.
-
Real-time weather data
For starters, it adds real-time value. Instead of just browsing static content, visitors get useful, up-to-date information they can actually use.
This is especially helpful for travel blogs, event pages, or local businesses where weather directly impacts decisions.
-
Engagement boost
It also helps increase engagement. When users find something practical on your site, they tend to stay longer and explore more.
A live weather update creates a reason to pause, check, and even come back later.
The weather widget brings significant change to your site
-
Credibility enhancing
Another benefit is enhancing credibility and user experience.
A dynamic element like a weather widget makes your website feel more modern, active, and thoughtfully designed, not just a basic page with text and images.
-
Content personalization
Finally, it’s an easy way to personalize your content.
By showing weather based on a specific location, your site feels more relevant and tailored to your audience.
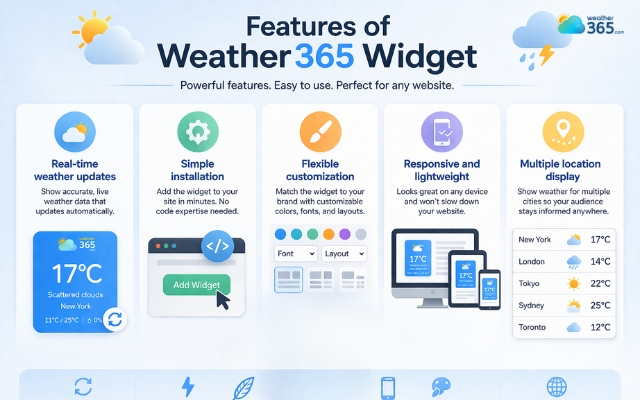
Features of Weather365 Widget
Now that you understand why a weather widget matters, the next step is choosing one that’s actually worth using.
That’s where Weather365 stands out - it’s built to be both powerful and easy to use.
-
Real-time weather updates
One of its biggest strengths is real-time weather updates.
The widget continuously pulls live data, so your visitors always see accurate temperature, conditions, and forecasts without needing to refresh the page.
-
Simple installation
Another key feature is simple integration with Wix. You don’t need any coding skills: just copy and paste the embed code, and it works seamlessly within your site.
This makes it perfect for beginners or anyone who wants a quick setup.
Features of the Weather365 widget
-
Flexible customization
Weather365 also offers flexible customization.
You can adjust colors, layouts, and display styles to match your website’s design. Instead of looking like a third-party add-on, the widget feels like a natural part of your site.
-
Responsive and lightweight
In addition, it’s responsive, mobile-friendly, and lightweight.
The widget adapts smoothly across different screen sizes while staying fast to load, so it won’t slow down your website or affect performance.
-
Multiple location display
Finally, the ability to display multiple locations is a huge plus, especially for travel websites, global businesses, or blogs targeting different regions.
How To Add Weather Widget for Wix
Now let’s walk through how to add weather widget to any platform, using Wix as an example.
Fortunately, the process is straightforward and doesn’t require any coding knowledge.
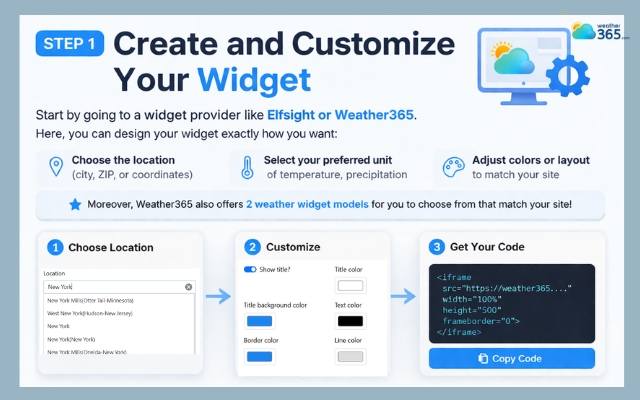
Step 1: Create and Customize Your Widget
Start by going to a widget provider like Elfsight or Weather365.
Here, you can design your widget exactly how you want: choose the location, select your preferred unit of temperature or precipitation, and adjust colors or layout to match your site.
Moreover, Weather365 also offers 2 weather widget models for you to choose from that match your site!
Create and customize the widget
Step 2: Copy the Embed Code
Once you’re happy with the design, the platform will generate a unique HTML embed code.
Simply copy this code - it’s what connects the widget to your Wix site.

Copy the provided code
Step 3: Add an HTML Embed Element in Wix
Next, head over to your Wix Editor:
-
Click “Add (+)” on the left panel
-
Go to Embed Code
-
Select Embed HTML
This creates a space on your page where external widgets can be displayed.
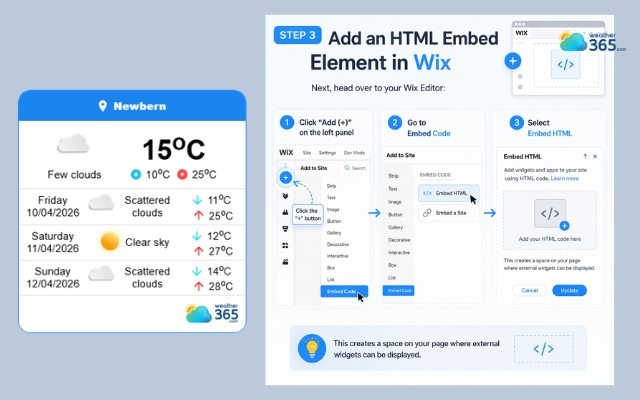
Create an embed space on your page
Step 4: Paste the Code and Apply
Click on the HTML box, choose “Enter Code”, and paste the embed code you copied earlier. Then click Apply to load the widget.
At this point, your weather widget will already start appearing on the page.
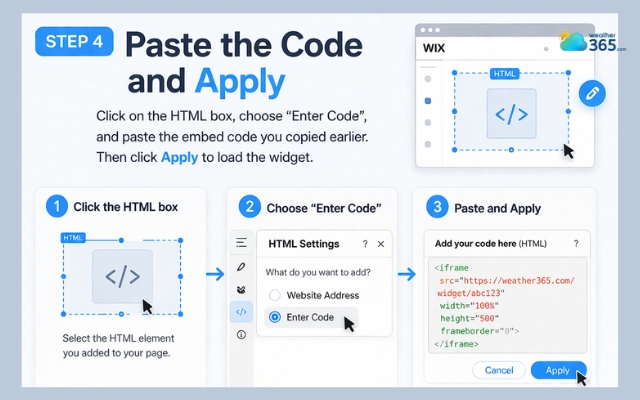
Paste the code to get the widget
Step 5: Adjust Size, Position, and Mobile View
Drag the widget to your desired position and resize it so everything displays properly.
You should also switch to mobile view to make sure it looks good on smaller screens.
A well-placed, properly sized widget will feel like a natural part of your layout, not something “pasted in.”
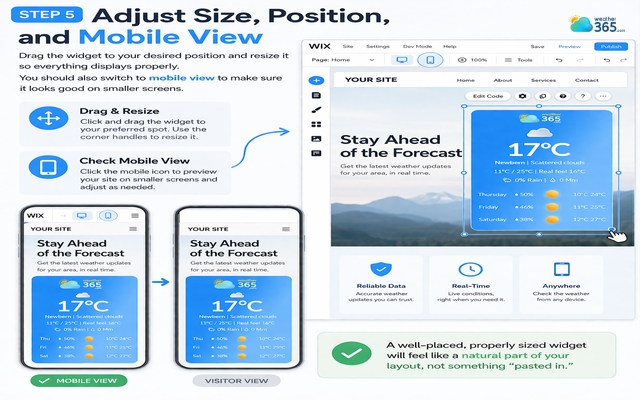
Drag the widget to your desired position
Step 6: Publish Your Site
Finally, click Publish to make your changes live. Your visitors can now see real-time weather updates directly on your Wix site.
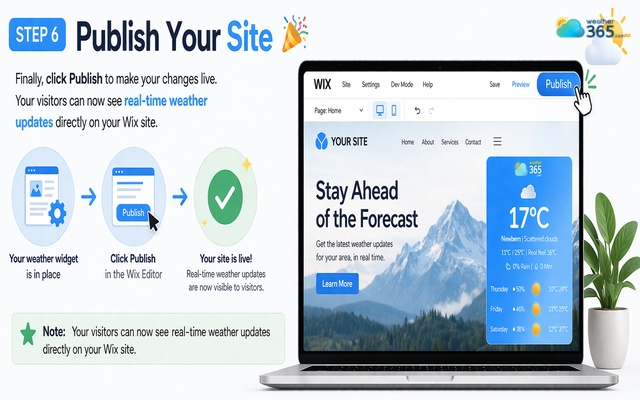
Publish your site and enjoy the widget
Read also:
Sum up
Adding a Weather widget for Wix is a quick and effective way to enhance your site’s functionality and user experience. With tools like Weather365, you can install and customize a fully responsive widget in just a few minutes—no coding skills required.
Frequently Asked Questions (FAQs)
Related post

How to Add Weather Widget for WordPress? A Step-by-step Guide

How to Add Weather Widget to Any Platform? A Complete Guide for Beginners

0 Comment
Leave a comment
Your email address will not be published. Required fields are marked *