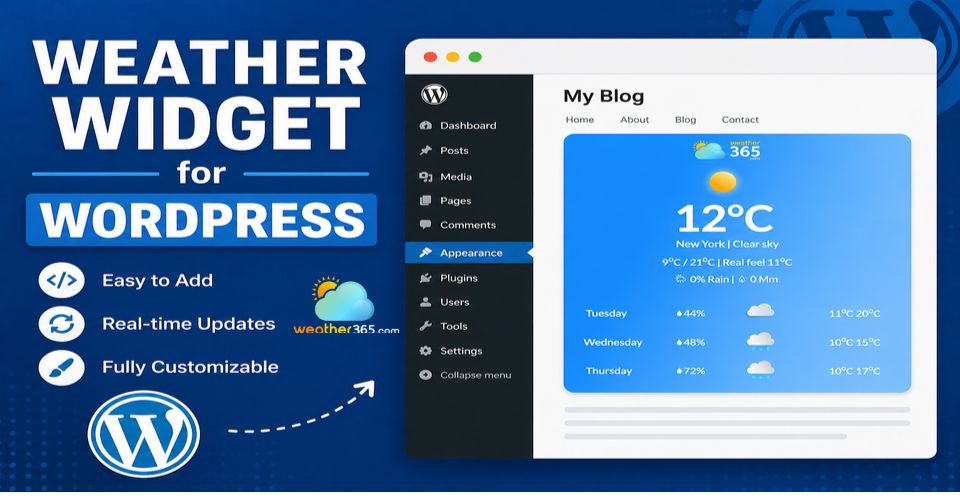
How to Add Weather Widget for WordPress? A Step-by-step Guide
It cannot be denied that a weather widget brings many advantages to your website. If you are looking for the easiest way to add weather widget for WordPress, here you are. In this post, Weather365 will guide you step-by-step to embed an accurate weather widget for websites. So, let’s get started!
Steps to add Weather Widget to WordPress
Free Weather365 Widget
Weather365 Widget is one of the best weather widgets for websites, a powerful yet easy-to-use solution that brings real-time weather updates directly to your WordPress.
Designed for simplicity, it allows you to create and embed a widget in just a few steps without coding requirements.
The widget is completely FREE, making it accessible for businesses, bloggers, and developers alike.
With its sleek, modern design and full customization options, you can match the widget seamlessly with your WordPress’s style.
Whether you want to display current conditions or detailed forecasts, Weather365 enhances user experience while adding practical, real-time value to your platform.
How to add Weather Widget for WordPress
Adding a no-code weather widget for WordPress using Weather365 is simple and requires no technical skills.
Follow these simple steps to add the Weather365 widget to WordPress in minutes.
These steps also apply to other plastforms . See our full guide on how to add weather widget to any platform, you can apply them with others apart from WordPress.
Step 1: Customize Weather365 Widget
Visit Weather365 and start creating your widget.
Choose the location you want to display, then select the type of data, such as a 3-day weather forecast, a 5-day forecast, or a 7-day weather forecast.
Customize the display model, colors, units, and layout to match your website branding.
After that, click the “Create Widget” button. You will see an HTML code in the right frame.
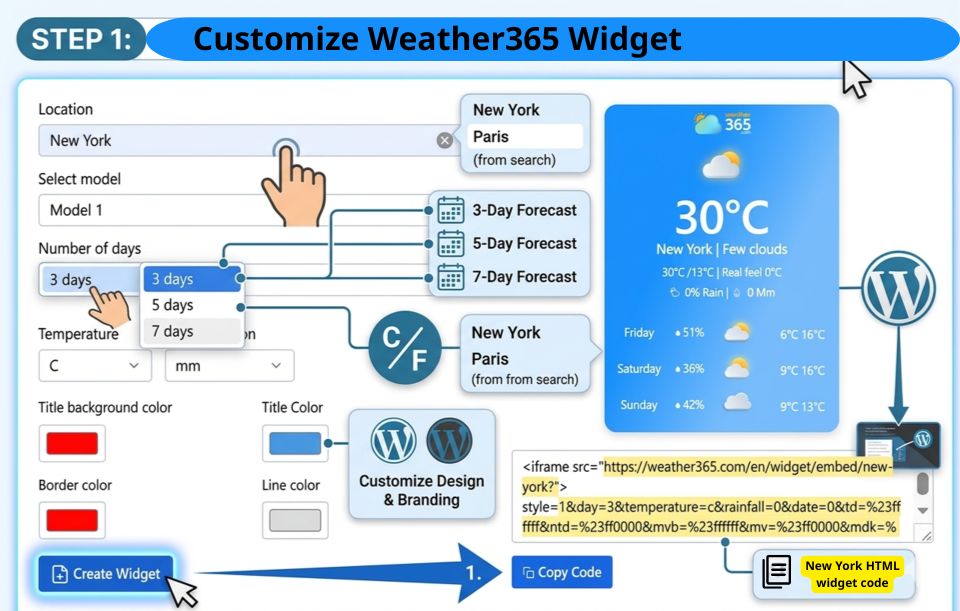
Step 1: Create a Weather365 widget and copy the HTML code
Step 2: Create and Embed the Code in WordPress
Log in to your WordPress admin dashboard and open the page, post, or widget area where you want the weather widget to appear.
If you are using the weather widget for WordPress Gutenberg, click the “+” button to add a new block and select Custom HTML. Paste the embed code directly into this block.
If you want to display the widget in a sidebar or footer, go to Appearance → Widgets, add a Custom HTML widget, and paste the same code there.
For Elementor users, you can use the HTML widget element and insert the code in the same way.
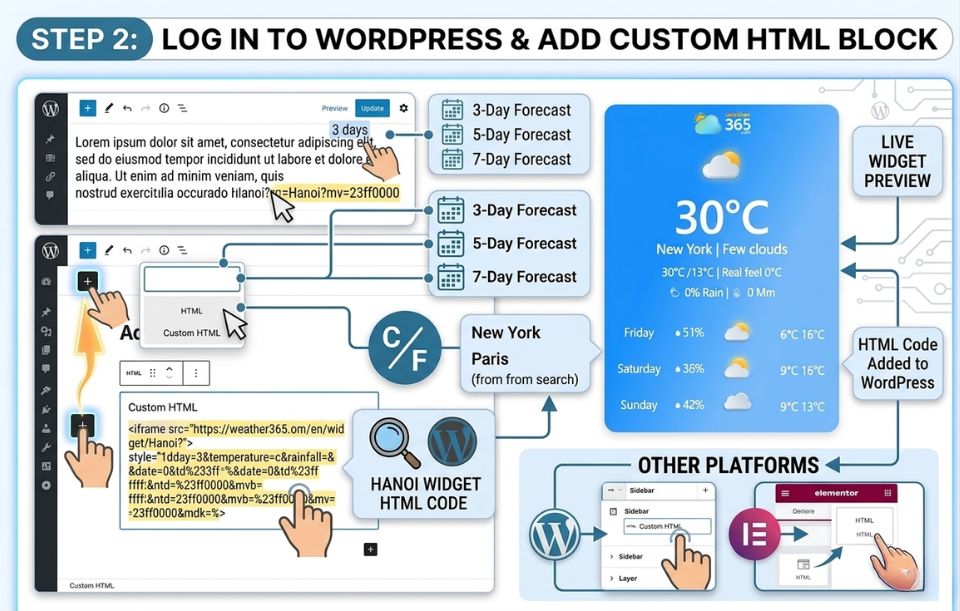
Step 2: Insert the HTML weather widget to WordPress
Step 3: Preview and Publish
After embedding, click Preview to check how the widget looks on both desktop and mobile devices. Make sure the layout is responsive and does not conflict with your theme.
Once satisfied, click Publish or Update to make it live.
Your Weather365 widget will now display real-time weather updates, helping improve user experience, increase engagement, and add practical value to your WordPress website.
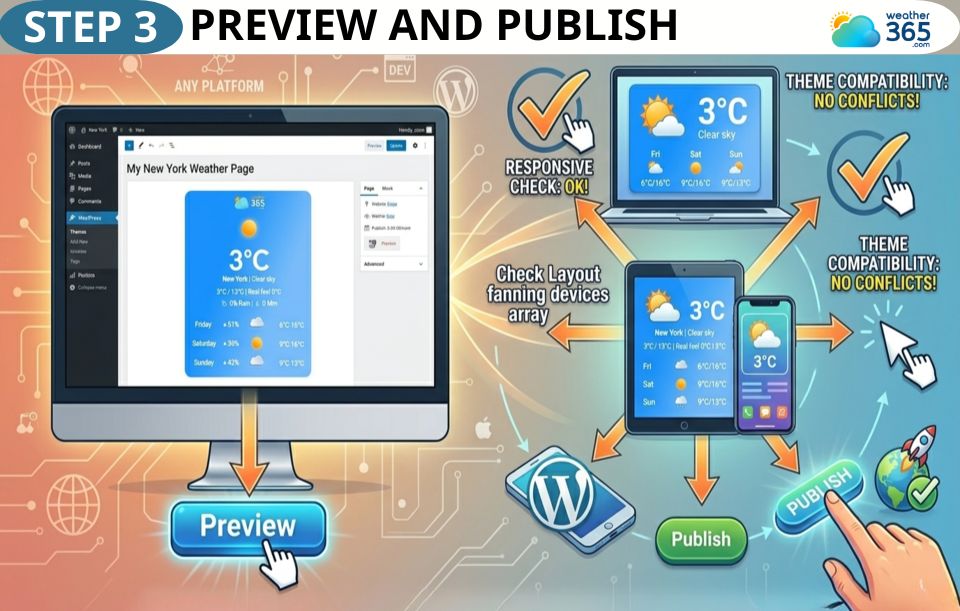
Remember preview before publishing Weather365 widget on your site
If you are interested in ways to add a weather widget on different platforms, read now:
Common mistakes when adding widgets
A common mistake when adding widgets is placing the embed code incorrectly, such as inserting it into a text block instead of a Custom HTML block, which prevents the widget from rendering properly.
Many users also overlook responsiveness, causing the widget to display poorly on mobile devices.
Another issue is adding too many widgets apart from weather widgets, which can slow down page load speed and negatively impact SEO.
Conflicts with themes or plugins are also frequent, especially when scripts are blocked or overridden.
Finally, failing to test after publishing often leads to broken layouts or missing data, reducing overall user experience and site performance.
For plasform-specific tips beyond WordPress, check our how to add weather widget to any platform.

Avoid common mistakes when you add Weather365 widget or other weather widgets
The bottom line
Follow 3 simple steps above, you will be able to add the sleek weather widget for WordPress to gain more visitors and your business. Besides, keep in mind common mistakes when adding widgets to avoid. Explore more about weather widgets for websites to find the best solution for your business.
Frequently Asked Questions (FAQs)
Related post

Weather Widget for Squarespace: Quick Guide to Display A Live Weather

How to Add Weather Widget to Any Platform? A Complete Guide for Beginners

Weather Widget for Wix: How To Add Live Weather In Minutes

0 Comment
Leave a comment
Your email address will not be published. Required fields are marked *