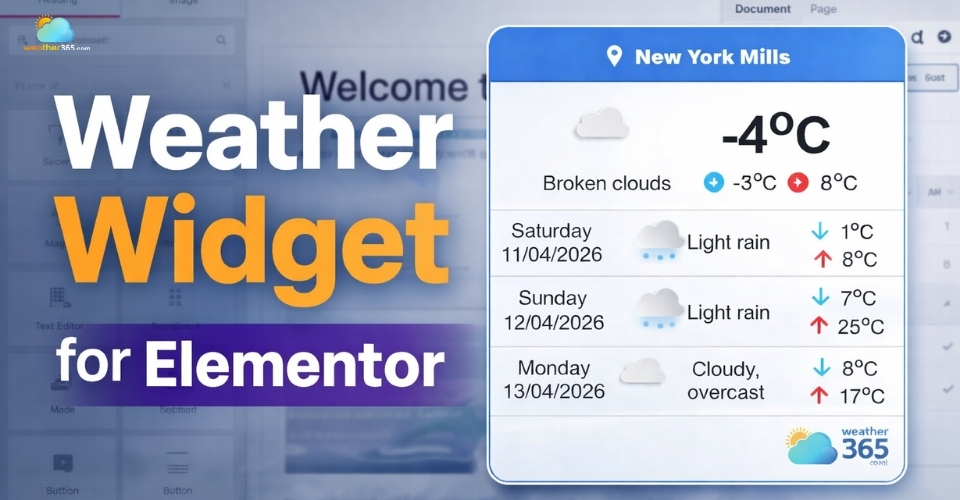
Weather Widget for Elementor: Adding Real-Time Forecast Easily
Weather Widget for Elementor often promises quick setup, but reality can mean broken layouts and wasted time. If you're tired of trial and error, here’s a straightforward way to add a clean, responsive weather widget that actually enhances your site. Diving in!
Weather widget for Elementor
- What is Weather365 Widget?
- Weather365 widget features
- Why Elementor Needs A Weather Widget?
- How To Add Weather365 Widget for Elementor
- Step 1: Create and customize your Weather365 widget
- Step 2: Copy the embed code
- Step 3: Open Elementor and add an HTML widget
- Step 4: Paste the code and preview
- Step 5: Adjust layout and Publish your page
- Common Mistakes When Adding a Weather Widget for Elementor
What is Weather365 Widget?
If you’ve ever tried adding a weather feature to your website, you’ve probably run into the same issues: complicated setup, limited customization, or widgets that just don’t match your design.
That’s exactly where Weather365 Widget comes in.
Weather365 widget is a ready-to-use weather widget that lets you display real-time weather data directly on your website, without needing advanced coding skills.
It’s designed to work smoothly with modern builders like Elementor, making the whole process much more beginner-friendly.
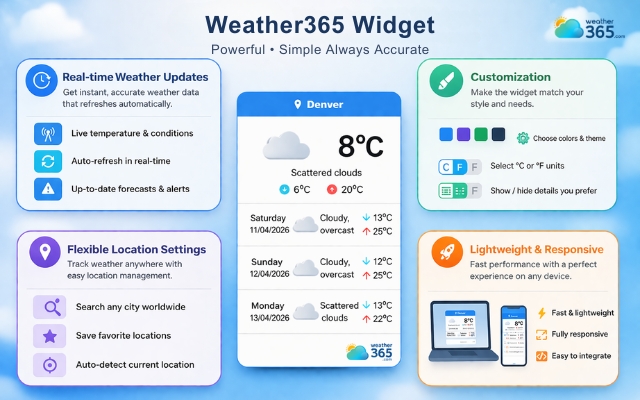
Weather365 widget features
Real-time weather updates
First, it provides real-time weather updates, including current conditions, hourly forecasts, and multi-day predictions.
This means your visitors don’t have to leave your site to check the weather, they get everything instantly, right where they are.
Customization
Second, it focuses heavily on customization.
Unlike many default widgets that look generic, Weather365 allows you to adjust colors, layout, and display styles so the widget actually blends into your website design.
Weather365 widget provides numerous unique features
Flexible location settings
Another important point is flexible location settings.
You can set a fixed location (great for local businesses, travel blogs, or event pages) or allow dynamic location display depending on your needs.
This makes the widget useful across many types of websites.
Lightweight and responsive
Performance is also a big deal.
Weather365 is built to be lightweight and responsive, meaning it won’t slow down your page or break your layout on mobile devices.
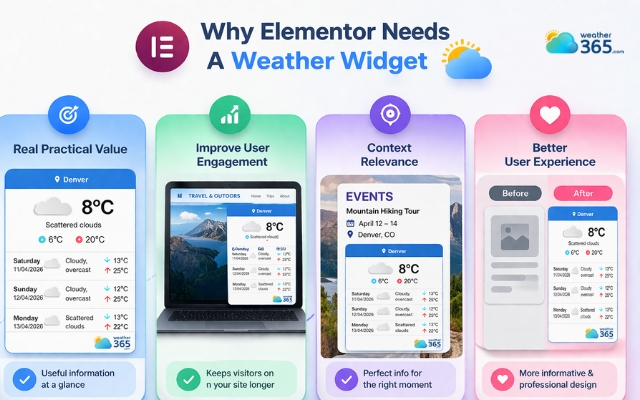
Why Elementor Needs A Weather Widget?
Elementor gives you full control over your website design, but without the right elements, even a beautiful site can feel a bit “empty” in terms of functionality.
Real practical value
First, it adds real practical value. Visitors don’t just come to browse, they want quick, useful information.
A weather widget lets them check real-time conditions instantly without leaving your site, which is especially helpful for travel blogs, local businesses, or event pages.
Improve user engagement
Second, it improves user engagement. When people find something useful, they tend to stay longer and interact more.
A small feature like live weather can quietly increase time on site and reduce bounce rate.
Weather widget can significantly affect Elementor
Context relevance
Another reason is context relevance. If your content is tied to a location, like tourism, outdoor activities, or local services weather information naturally supports your message.
It makes your content feel more complete and up-to-date.
User experience
Finally, there’s the user experience factor.
Elementor is all about design flexibility, and a well-integrated weather widget can enhance your layout instead of cluttering it if done right.
It turns your site from just “good-looking” into genuinely useful.
Not only Elementor, but it's also essential to have a weather widget for Webflow, Wix, or Shopify.
Read more:
How To Add Weather365 Widget for Elementor
Now it’s time to add a weather widget to your Elementor. And what choice can be better than the Weather365 widget?
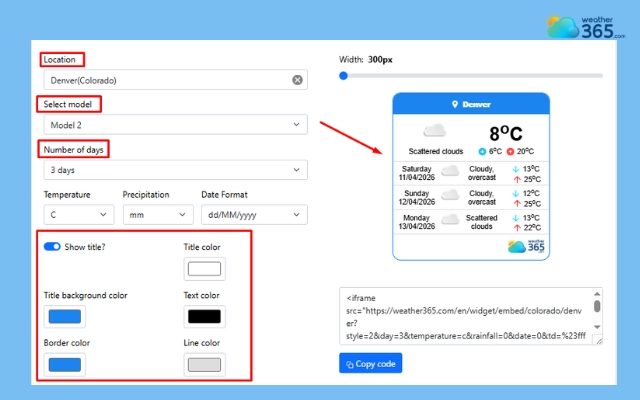
Step 1: Create and customize your Weather365 widget
Start by creating your widget on the Weather365 (or similar platform). This is where you control how everything looks and works.
You can:
Set your location (specific city or dynamic location)
Choose the model (current weather, hourly forecast, 7-day forecast, etc.)
Set temperature/precipitation unit, date format
Customize title/background/border colors to match your website
Take a moment to preview your widget and make sure it fits your design.
A well-styled widget will feel like a natural part of your site, not something added last minute.
Freely customize the widget with Weather365
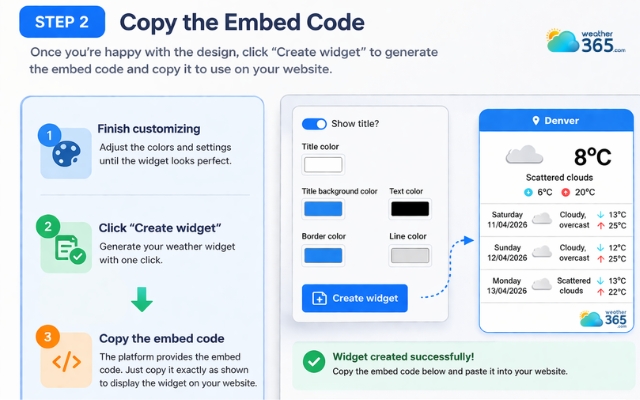
Step 2: Copy the embed code
Once you're happy with the design, click “Create widget” then the platform will generate an embed code for you.
This code is what allows the widget to display on your website. You don’t need to edit it, just copy it exactly as provided.
Generate and copy the code
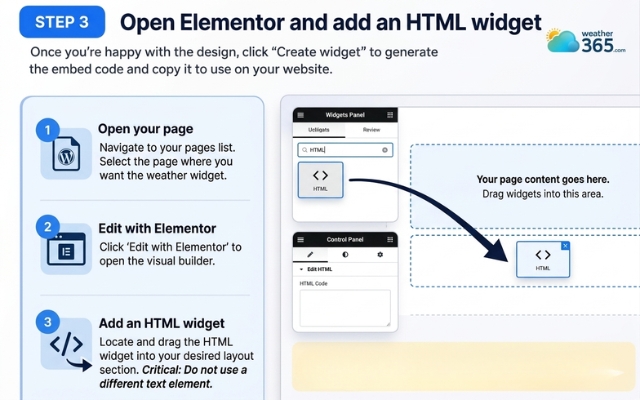
Step 3: Open Elementor and add an HTML widget
Next, go to your WordPress dashboard:
Open the page where you want the weather widget
Click “Edit with Elementor”
Drag and drop the HTML widget into your layout
Make sure you’re using the HTML element - this is essential for embedding external widgets properly.
Add an HTML widget to the layout
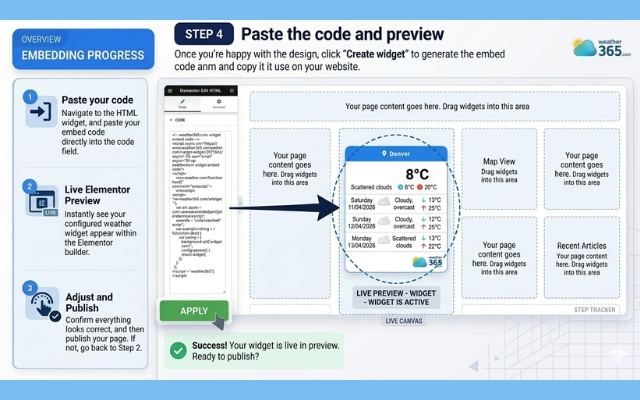
Step 4: Paste the code and preview
Paste your embed code into the HTML box.
Right away, Elementor will show a live preview of your weather widget.
This is helpful because you can instantly see if something looks off and adjust it before publishing.
Step 5: Adjust layout and Publish your page
Before going live, spend a few minutes refining the placement:
Resize the widget so it fits your layout
Check spacing and alignment
Switch to tablet and mobile view to ensure responsiveness
A widget might look perfect on a desktop but break on mobile if you skip this step.

Check the widget before publishing
Once everything looks good, click Publish.
After that, visit your live site and do a final check to make sure:
The widget loads correctly
Weather data is accurate
It doesn’t slow down your page
It's straightforward to add a weather widget, so that you can learn how to add weather widget to any platform, and apply it to your sites.
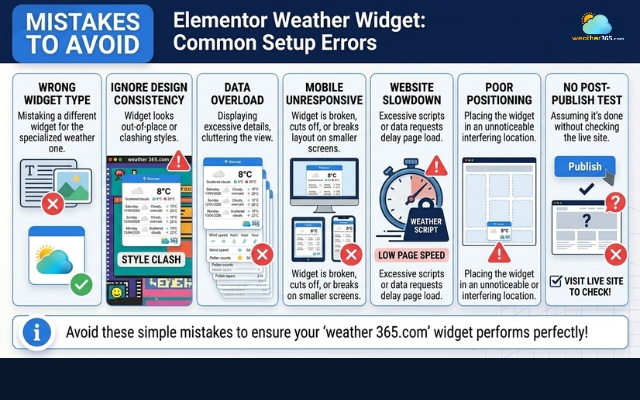
Common Mistakes When Adding a Weather Widget for Elementor
Adding a weather widget into Elementor is easy; yet many users still run into small mistakes that affect performance, design, or user experience.
The problem is, these issues are often easy to overlook until your site starts feeling “off.”
Let’s go through the most common ones so you can avoid them from the start.
Choosing the wrong widget type
Ignoring design consistency
Overloading the widget with too much data
Not checking mobile responsiveness
Slowing down your website
Placing the widget in the wrong position
Forgetting to test after publishing
Avoid mistakes when adding a weather widget
Closing thought
A well-placed Weather Widget for Elementor can elevate your website without overwhelming it. For a broader overview of all available options, visit our guide on weather widgets for websites.
Frequently Asked Questions (FAQs)
Related post

How to Add Weather Widget for WordPress? A Step-by-step Guide

Weather Widget for Squarespace: Quick Guide to Display A Live Weather

0 Comment
Leave a comment
Your email address will not be published. Required fields are marked *