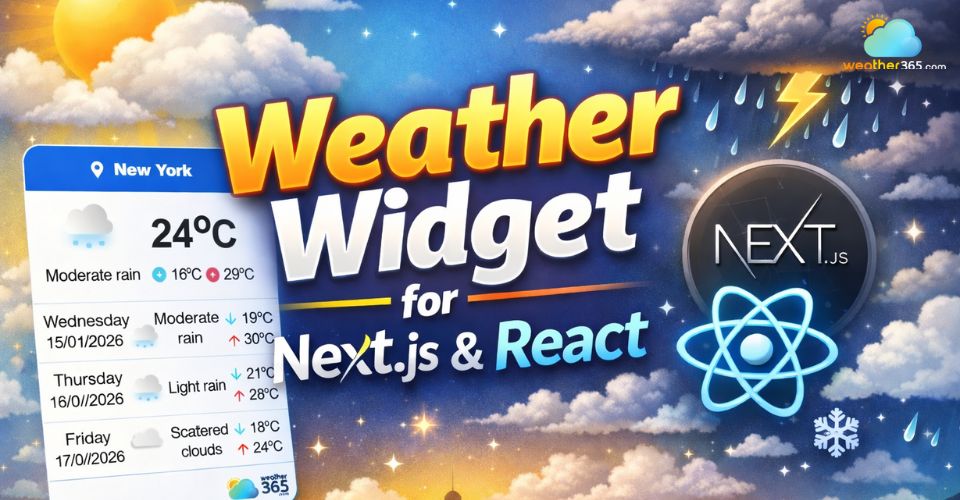
Weather Widget for Next.js & React: How to Add and Customize It Easily
Weather Widget for Next.js & React can instantly make your app more dynamic, but how do you add one without overcomplicating your code? In this guide, you’ll discover a simple way to integrate, customize, and optimize a widget that actually enhances user experience. Diving in!
Weather widget for Next.js & React
- Why Adding a Weather Widget for Next.js & React?
- Weather365 Widget Key Features
- How to Add Weather365 Widget to Next.js & React
- Step 1: Customize the Weather365 widget
- Step 2: Generate the embed code
- Step 3: Add widget to Next.js project
- Step 4: Integrate the widget in React app
- Step 5: Test responsiveness and performance
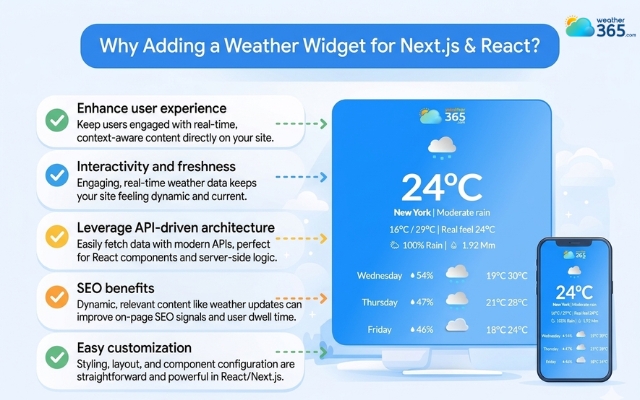
Why Adding a Weather Widget for Next.js & React?
Adding a Weather Widget for Next.js & React can make your application feel more useful, dynamic, and user-focused.
In modern web development, users expect real-time, relevant information, and weather data is one of the easiest ways to deliver that instantly.
-
Enhance user experience
First, a weather widget enhances user experience (UX) by providing contextual value.
For example, if your website is related to travel, events, or even eCommerce, showing current weather conditions can influence user decisions.
Visitors don’t need to leave your site to check the forecast, which keeps them engaged longer.
-
Interactivity and freshness
Another key reason is interactivity and the freshness of content.
Static pages can feel outdated, but a widget that updates in real time adds a sense of “live” data.
This is especially important for apps built with Next.js and React, where dynamic rendering and API integration are already core strengths.
Benefits of adding a weather widget for Next.js & React
-
Leverage API-driven architecture
From a technical perspective, integrating a widget is also a great way to leverage API-driven architecture.
It helps developers practice working with external data sources, handling asynchronous requests, and optimizing performance, skills that are essential when building scalable React or Next.js applications.
-
SEO benefits
There’s also an SEO and engagement benefit.
While a weather widget itself doesn’t directly boost rankings, it can improve on-site metrics like time on page and user interaction.
These signals indirectly support better search performance over time.
-
Easy customization
Finally, adding a weather widget allows for easy customization and branding. You can match it with your UI, adjust layouts for mobile responsiveness, and even tailor the data display based on user location.
This flexibility makes it a small feature with a surprisingly big impact.
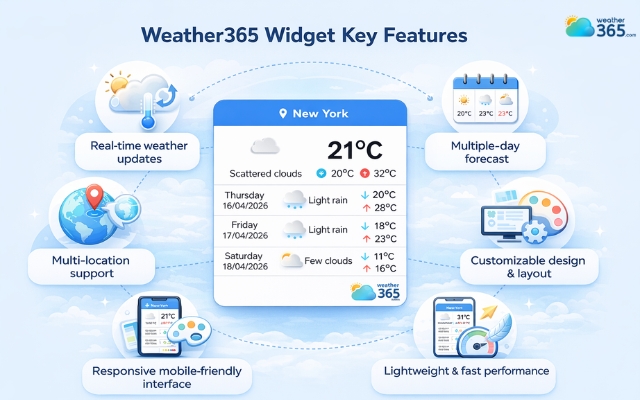
Weather365 Widget Key Features
Weather365 Widget is designed to give users a simple yet powerful way to access real-time weather data directly on a website.
Instead of forcing users to open separate apps or search for forecasts, it brings all essential weather information into one clean, responsive interface that works smoothly across devices.
In short, Weather365 widget focuses on clarity, speed, and practical daily use.
-
Real-time weather updates
Weather365 Widget continuously updates important weather data such as temperature, humidity, wind speed, and general conditions.
This helps users always see the most accurate and up-to-date information without needing to refresh the page manually.
It’s especially useful for websites where timely information affects user decisions.
Notable features of the Weather365 widget
-
Multiple-day forecast
The widget provides both short-term (3-day) and long-term (5 and 7-day) forecasts.
This allows users to quickly understand immediate weather changes as well as plan ahead for upcoming days.
For travel, events, or outdoor services, this feature significantly improves user decision-making.
-
Multi-location support
Users can easily switch between different locations within the same widget.
This is useful for websites serving international audiences or businesses that operate in multiple cities.
It ensures visitors always get relevant local weather data.
-
Customizable design & layout
Weather365 Widget can be adjusted to match your website’s UI style.
You can modify layout, appearance, and display settings so the widget blends naturally with your Next.js & React interface, instead of looking like an external tool.
-
Responsive mobile-friendly interface
The widget automatically adapts to different screen sizes, from desktop to mobile.
This ensures a smooth user experience across all devices, which is essential in modern web design where mobile traffic often dominates.
-
Lightweight and fast performance
Despite offering rich features, the widget is optimized to remain lightweight.
It loads quickly and does not significantly affect website performance, making it a good choice for developers who care about both UX and speed.
How to Add Weather365 Widget to Next.js & React
Adding the Weather365 Widget to a Next.js & React project is quite straightforward because it works through a simple embed code.
You don’t need to build the weather logic yourself, just integrate the provided script and customize it to fit your site.
Step 1: Customize the Weather365 widget
First, go to the Weather365 widget configuration page and customize how your widget should look and behave.
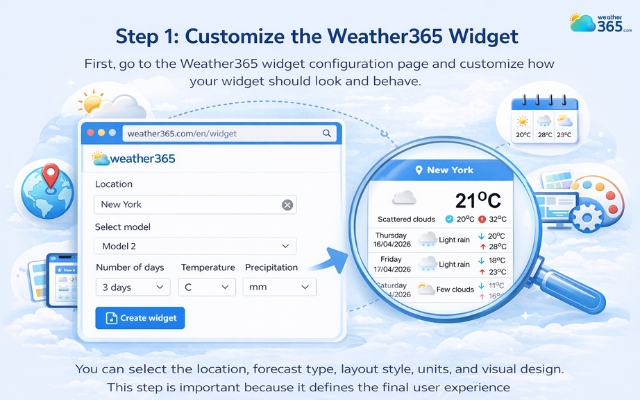
Choose the location you want to show on the widget
You can select the location, forecast type, layout style, units, and visual design.
This step is important because it defines the final user experience before generating any code.
Step 2: Generate the embed code
After finishing the customization, click “Create widget”, and Weather365 will generate an embed code (HTML/JavaScript snippet).
This code contains all your selected settings, so you don’t need to manually configure anything in your project.
You simply copy it and prepare to integrate it into your app.
If you prefer a no-code approach, you might also want to try a Weather Widget for Elementor for quick and flexible setup.
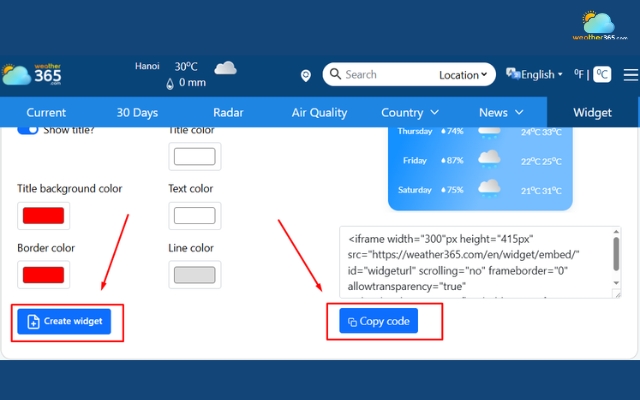
Generate code by clicking Create widget
Step 3: Add widget to Next.js project
In a Next.js application, you should place the widget in a global layout file such as app.js or layout.tsx depending on your setup.
Use the Script component from Next.js to control script loading behavior. This helps improve performance and avoids blocking the initial page render.
For more design-focused platforms, check out how to integrate a Weather Widget for Webflow for greater visual control.
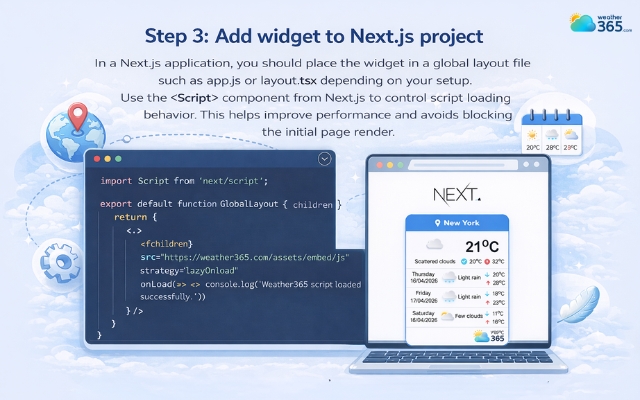
Use the Script to control script loading
Step 4: Integrate the widget in React app
For React projects, the safest approach is to load the widget inside a useEffect hook.
This ensures the script runs only on the client side after the component has mounted, preventing issues caused by server-side rendering.
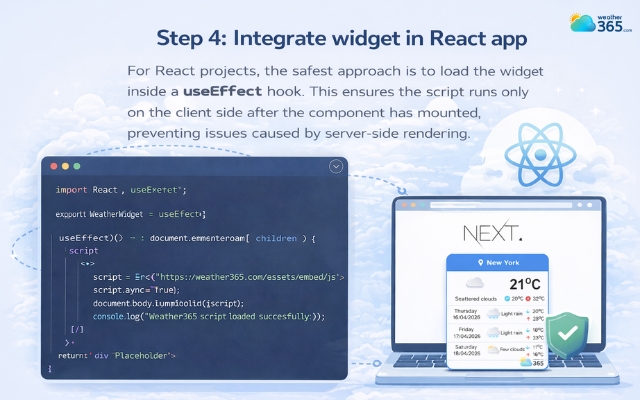
Load the widget inside a useEffect hook
Step 5: Test responsiveness and performance
Finally, test the widget across different devices such as mobile, tablet, and desktop.
Make sure it displays correctly, adapts to screen sizes, and does not negatively affect page speed.
Feel good? Wanna add a weather widget to other platforms? Check out our guide on how to add a weather widget to any platform.
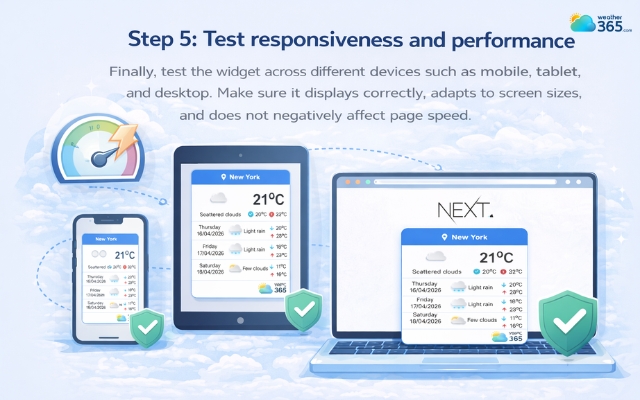
Test the widget to make sure it runs smoothly
Final Thought
Did you encounter any problems while adding a weather widget for Next.js & React? We are always here to help. Hopefully Weather365 widget can help you create a smoother, more engaging user experience, keep your visitors informed in real time, and make your website more interactive and valuable for everyday use.
Frequently Asked Questions (FAQs)
Related post

Weather Widget for HubSpot: Add Real-Time Forecast Easily

Adding Weather Widget for SharePoint & Google Sites Easily

0 Comment
Leave a comment
Your email address will not be published. Required fields are marked *