Weather Widget for Magento & WooCommerce: Guide To Easy And Quick Setup
Struggling to make your store feel more dynamic and engaging? A Weather Widget for Magento & WooCommerce might be the simple upgrade you’re missing. It adds real-time context to your site and improves user experience, without any complicated setup. Let’s walk through how to make it work for you.
Weather widget for Magento & WooCommerce
- Choose Weather Widget for Magento & WooCommerce
- Customize Your Weather Widget
- Copy the Weather Widget Embed Code
- Add Weather Widget to Magento
- Add Weather Widget to WooCommerce
- Option 1: Using a Custom HTML block (recommended)
- Option 2: Using widget areas (sidebar/footer)
- Adjust Display
- Test and Publish Your Website
Choose Weather Widget for Magento & WooCommerce
It is really important to choose the right weather widget for your store.
Not all widgets are built the same, and picking the wrong one can make your site look cluttered, slow, or simply… irrelevant.
A good weather widget should be easy to use, require no coding, and work smoothly on both Magento and WooCommerce.
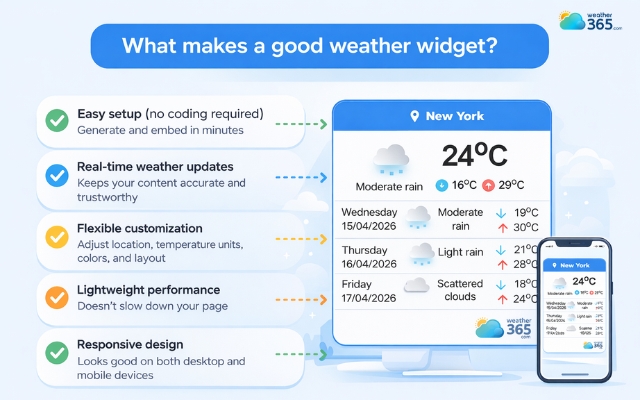
So, what makes a good weather widget? Here are a few must-have criteria:
-
Easy setup (no coding required): You should be able to generate and embed it in minutes
-
Real-time weather updates: Keep your content accurate and trustworthy
-
Flexible customization: Adjust location, temperature units, colors, and layout to match your site
-
Lightweight performance: Doesn’t slow down your page or affect loading speed
-
Responsive design: Looks good on both desktop and mobile devices
When a widget checks all these boxes, it improves user experience.
And if you’re looking for a simple, reliable option, the Weather365 widget is a solid choice that covers all these essentials without overcomplicating the process.
Weather365 widget is one of the most reliable widget providers
Customize Your Weather Widget
Once you’ve chosen your widget, the next step is to customize it so it actually fits your website. A well-tuned widget feels more relevant and improves the overall user experience.
With Weather365 widget, here are the key elements you can adjust:
-
Location: Choose a city or region that matches your target audience or business location
-
Layout model: Pick between minimal or detailed layouts, and horizontal or vertical formats depending on placement
-
Number of forecast days: Show fewer days (1–3) for a clean look or more (5–7) for extra detail
-
Temperature & precipitation units: Select °C or °F and decide whether to display rain/snow information
-
Date format: Adjust to match your audience (e.g., DD/MM or MM/DD) for better readability
-
Colors & styling: Customize title, text, lines, borders, and background colors to match your site design
With Weather365, you can tweak all these settings in just a few clicks - no coding needed, but still fully tailored to your brand.
No matter which platform you’re using, the setup process is quite similar. For example, adding a weather widget for Webflow follows the same no-code approach.
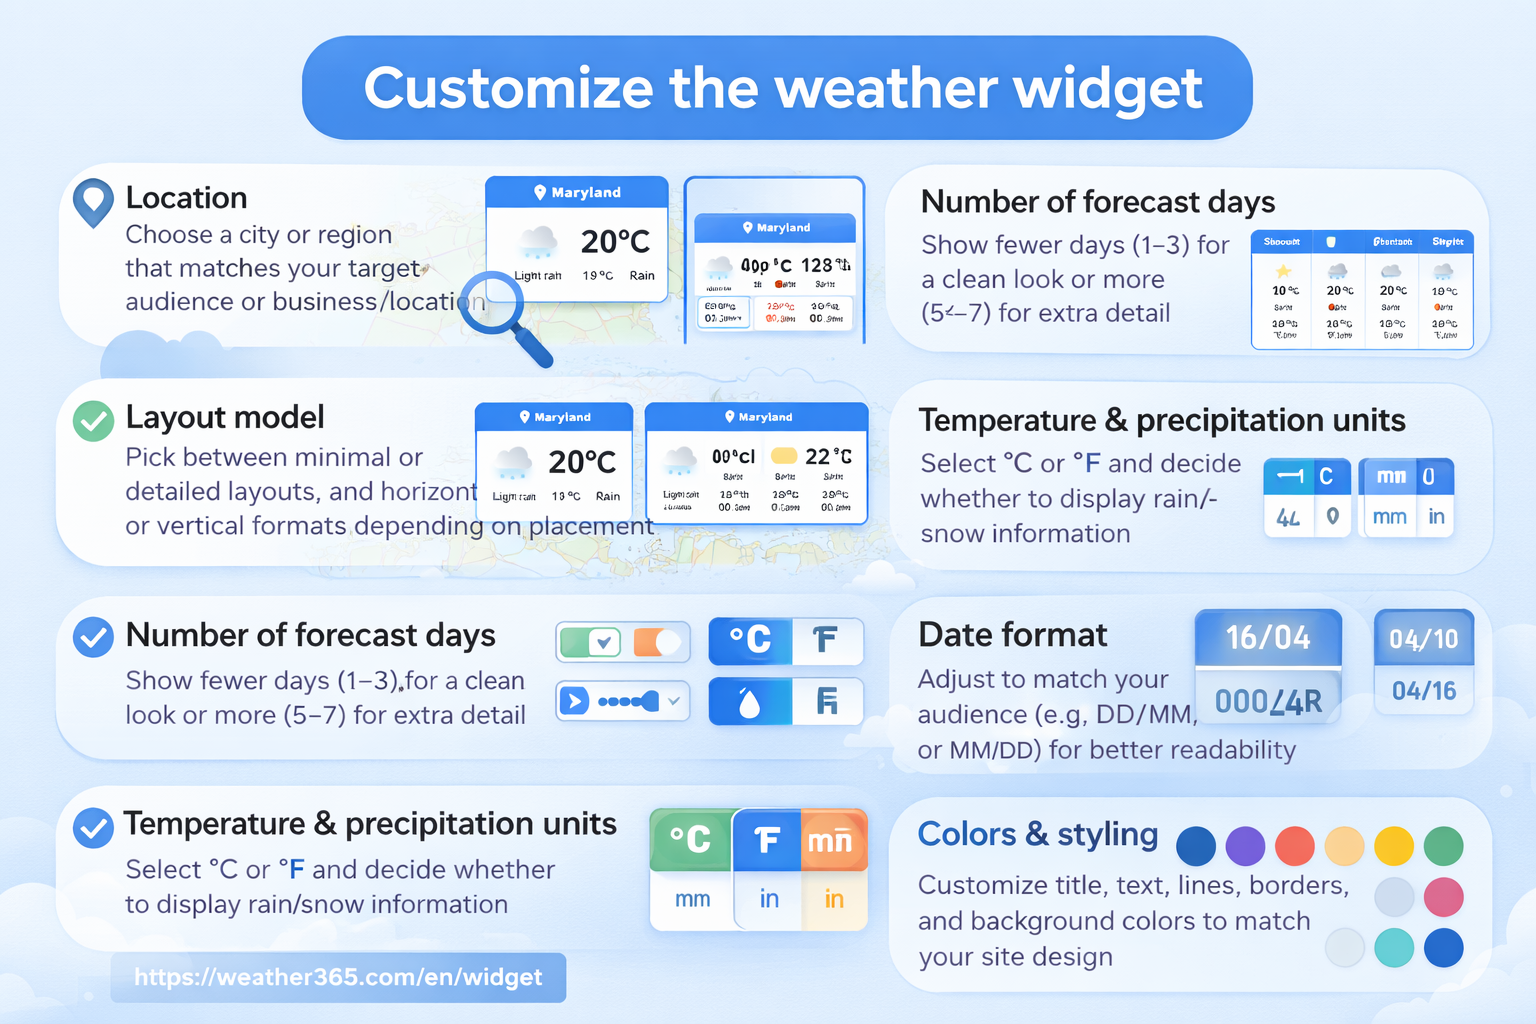
Customize the weather widget with Weather365
Copy the Weather Widget Embed Code
After customizing your widget, the next step is simple but very important: copying the embed code.
On platforms like Weather365, once you finish your setup, you just need to click “Create widget” and then copy the generated HTML code.
Here’s how it works in practice:
-
Click Create widget after customizing
-
Copy the HTML embed code (usually with a single click)
-
Make sure you copy the full code (no missing parts)
This code is essentially a small snippet that tells your website what to display and where. You don’t need to understand the code, you just need to copy and paste it correctly.
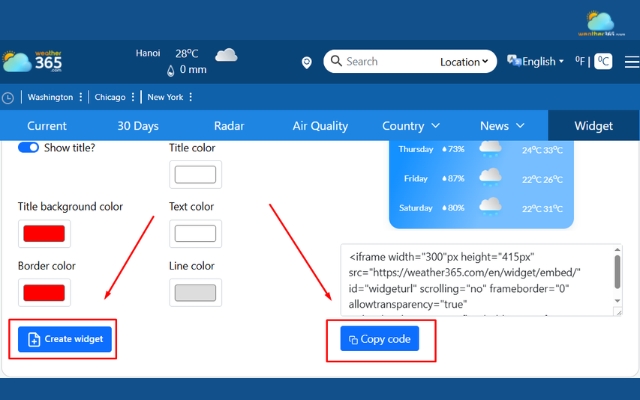
Generate and copy the code
If you’re using a different CMS, this guide on how to add weather widget to any platform will walk you through the general process.
Add Weather Widget to Magento
Now that you have your embed code ready, it’s time to add the weather widget to your Magento store.
The process might sound technical at first, but it’s actually quite straightforward once you know where to paste the code.
In Magento, widgets are usually added through CMS pages or blocks.
This gives you flexibility to place the weather widget exactly where you want: homepage, footer, or even a custom section.
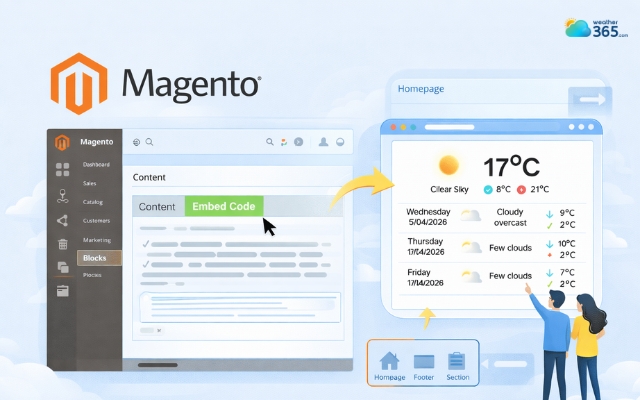
Create a new block in Magento
Here’s how to do it:
-
Go to your Magento Admin Dashboard
-
Navigate to Content → Blocks (or Pages, depending on where you want the widget)
-
Create a new block or edit an existing one
-
Switch to the HTML editor
-
Paste the weather widget embed code
-
Save and preview the result
Tip: If the widget doesn’t show up right away, check if the editor is filtering HTML. Sometimes switching to “HTML mode” or disabling the visual editor helps.
Add Weather Widget to WooCommerce
If you’re using WooCommerce (WordPress), adding the widget is even more beginner-friendly.
Since WooCommerce runs on WordPress, you can use built-in tools like blocks or widgets, no technical setup needed.
If you’re also running stores on other platforms, you can explore how to add a weather widget for Shopify for a similar setup experience.
There are a few common ways to add your weather widget:
Option 1: Using a Custom HTML block (recommended)
-
Go to WordPress Dashboard
-
Open the page or post where you want the widget
-
Add a Custom HTML block
-
Paste the embed code
-
Update or publish
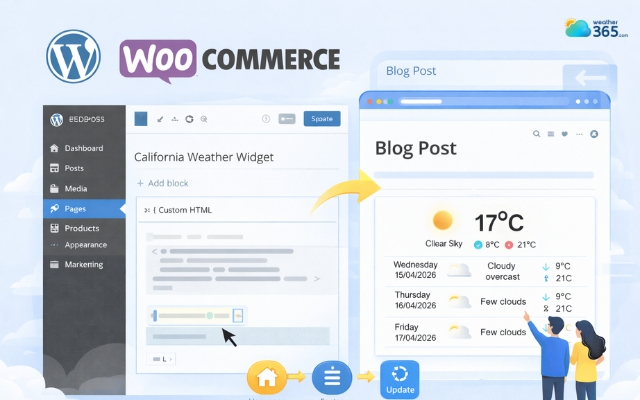
Using a Custom HTML block in WooCommerce
Option 2: Using widget areas (sidebar/footer)
-
Go to Appearance → Widgets
-
Choose a widget area (sidebar, footer, etc.)
-
Add a Custom HTML widget
-
Paste the code and save
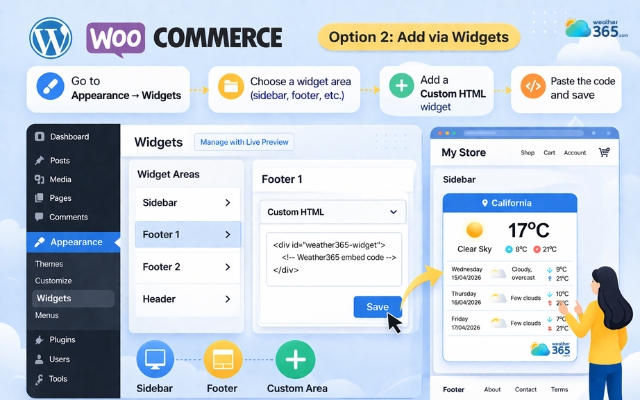
Using widget areas in WooCommerce
Adjust Display
After adding the widget, don’t stop there. A weather widget might be working, but if it looks off or breaks your layout, it can actually hurt the user experience instead of improving it.
This step is all about making sure your widget looks good on every screen and in every position.
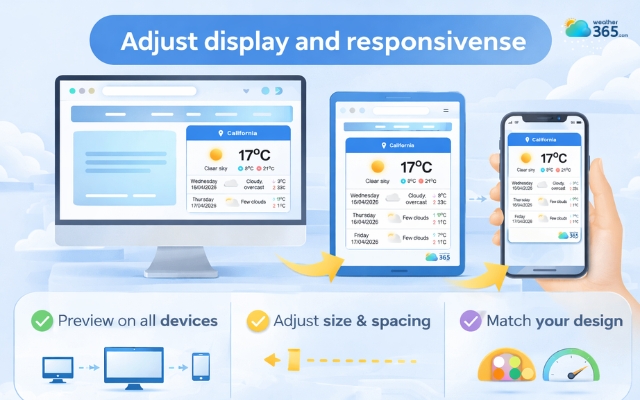
Preview the widget to adjust the display
Start by previewing your website on: Desktop, tablet, and mobile. Here’s what to check:
-
Preview on all devices: Desktop, tablet, and mobile to ensure it doesn’t look too big or too cramped
-
Adjust size & spacing: Keep enough padding and avoid crowding other elements
-
Match your design: Use colors and layout that blend with your website, not clash with it
-
Check performance: Make sure the widget loads quickly and doesn’t affect page speed
Test and Publish Your Website
Before going live, take a moment to review how your widget actually performs. Make sure it displays correctly, updates weather data properly, and fits well across different devices.
Even small issues in layout or loading can affect user experience.
Once everything looks clean and runs smoothly, you can publish your website with confidence.
At this point, your weather widget is fully integrated and ready to enhance your store.
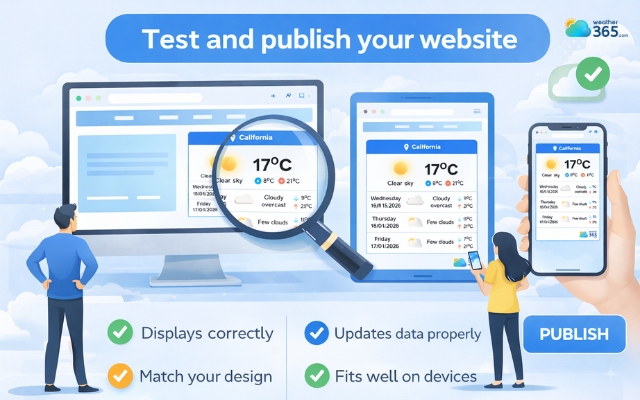
Test and publish the weather widget
Sum up
Have you successfully added the weather widget for Magento & WooCommerce yet? If you still have any problems, don't hesitate to leave a comment below. With Weather365 Widget, your site will perform beyond your expectations!
Frequently Asked Questions (FAQs)
Related post

How to Add Weather Widget to Any Platform? A Complete Guide for Beginners

Weather Widget for HubSpot: Add Real-Time Forecast Easily

0 Comment
Leave a comment
Your email address will not be published. Required fields are marked *