Weather Widget for Blog Platforms: Free Way To Elevate Your Blog Sites
Weather Widget for Blog Platforms helps you keep visitors on your site instead of bouncing elsewhere for updates. If you’ve ever struggled with low engagement, this small feature can help. Ready to improve your blog? Let’s walk through how to add it step by step.
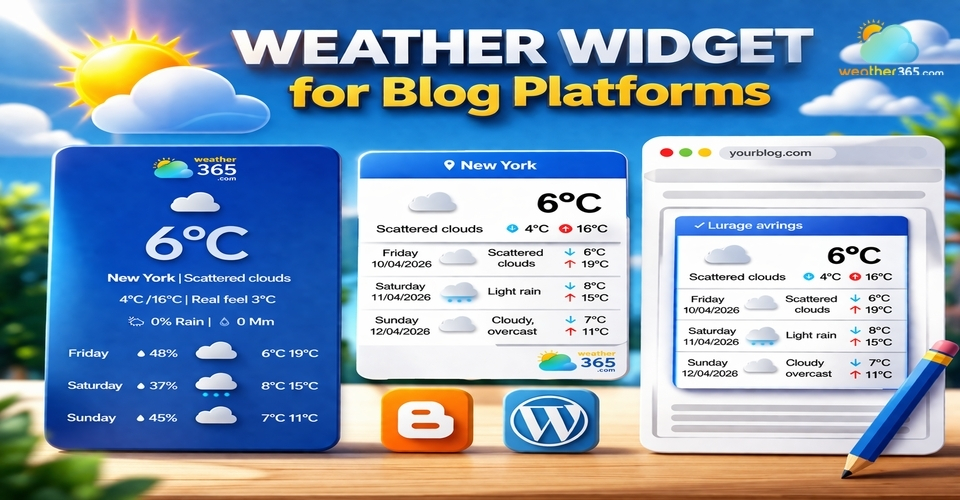
Weather widget for blog platforms
- Why Add A Weather Widget for Blog Platforms?
- Features of Weather365 Widget
- How To Add Weather365 Widget to Your Blog Platforms
- Step 1: Create your widget on Weather365
- Step 2: Copy the embed code
- Step 3: Access your blog platform editor
- Step 4: Add an HTML block or widget area
- Step 5: Preview on mobile and desktop
- Step 6: Publish and go live
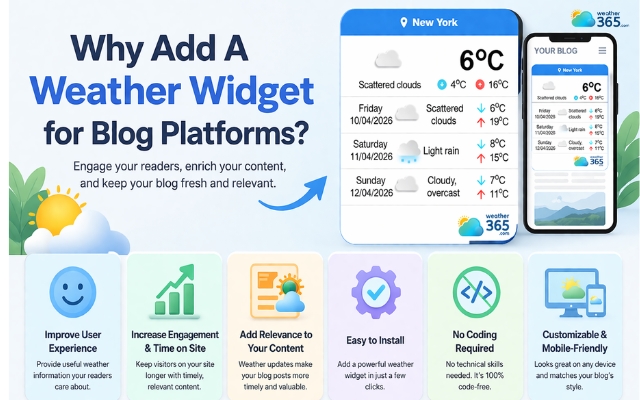
Why Add A Weather Widget for Blog Platforms?
A weather widget actually solves a very real problem: users leaving your site for quick information.
How often do people open a new tab just to check the weather?
If your blog doesn’t provide that information, they’ll leave, even if they were in the middle of reading your content.
And once they’re gone, there’s a good chance they won’t come back right away.
Now let’s see what else a weather widget can do for your blog site!
-
Improve user experience (UX)
A weather widget adds real, everyday value. It makes your blog feel more helpful and complete, not just a place to read but also a place to get quick, useful updates. -
Increase engagement and time on site
When visitors find extra value, they tend to stay longer, scroll more, and explore other content. This can lead to lower bounce rates and better overall performance. -
Add relevance to your content
If your blog is about travel, lifestyle, events, or local topics, weather information becomes highly relevant. It helps readers make decisions without needing to leave your page.
Adding a weather widget to boost your blog platforms
-
Easy to install, no coding required
Most modern weather widgets are designed for beginners. You can add them in just a few minutes without technical skills, making it a quick win for your blog. -
Customizable and mobile-friendly
Weather widgets today are flexible in design and fully responsive. You can match them with your blog’s style and ensure they look great on both desktop and mobile devices.
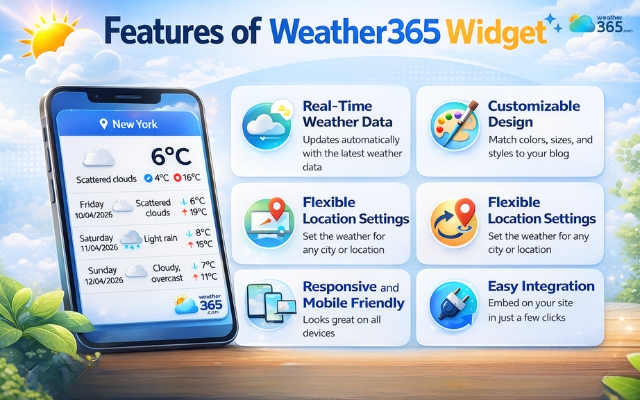
Features of Weather365 Widget
Some weather widget are slow, hard to customize, or simply don’t add much value.
Weather365, on the other hand, focuses on usability, flexibility, and performance, making it a strong fit for most blog platforms.
Here are the key features that make it stand out:
-
Real-time weather data
Weather365 delivers accurate, up-to-date weather information instantly. Your visitors can check current conditions without refreshing the page or leaving your site.
-
Customizable design
You can easily adjust colors, layout, and display styles to match your blog’s branding. This ensures the widget feels like a natural part of your website, not something out of place.
-
Flexible location settings
Weather365 lets you choose a fixed location or enable automatic location detection. This is especially useful if your blog targets different regions or a global audience.
Gold benefits of the Weather365 widget
-
Responsive and mobile-friendly
The widget adapts smoothly to all screen sizes. Whether users visit from a phone or desktop, the display remains clean and easy to read.
-
Lightweight and fast loading
Performance is a big deal for SEO and user experience. Weather365 is optimized to load quickly, so it won’t slow down your site.
-
Easy integration
You don’t need coding skills to get started. With a simple embed code, you can add the widget to your blog in just a few minutes.
How To Add Weather365 Widget to Your Blog Platforms
Worried about adding a weather widget to blog platforms without technical skills?
Don’t worry! You don’t need to be a developer. Most blog platforms today support custom widgets or embed codes, so the process is much simpler than it sounds.
Step 1: Create your widget on Weather365
Start by visiting the Weather365 website and choosing the widget style you like.
You can customize elements like layout model, colors, forecast type, and location.
This step ensures the widget matches your blog’s design and purpose.
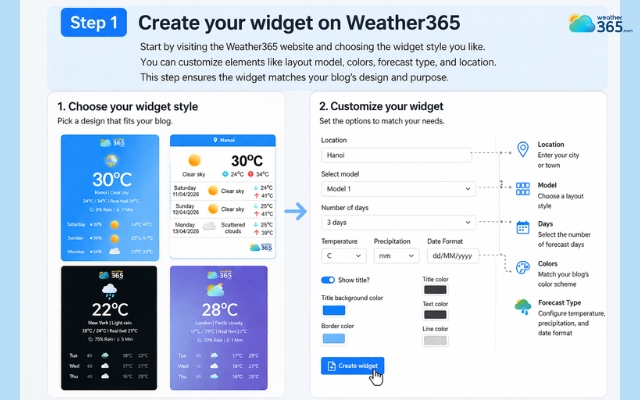
Customize the widget to match your blog style
Step 2: Copy the embed code
Once you’re done customizing, Weather365 will generate an embed code (usually HTML or JavaScript).
This is the key piece you’ll use to display the widget on your site, no coding knowledge needed, just copy it.
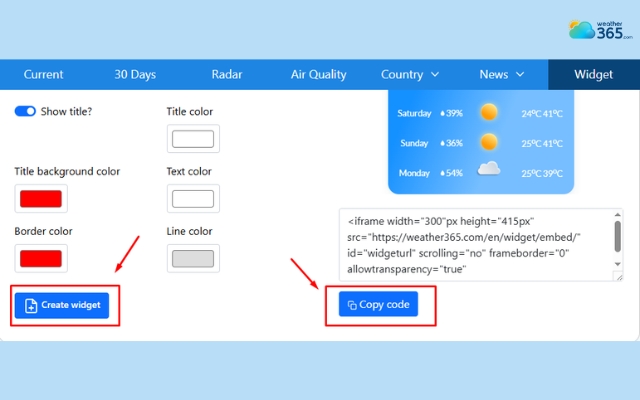
Weather365 widget generates the widget code automatically
Step 3: Access your blog platform editor
Log in to your blog platform (WordPress, Wix, Shopify, Squarespace, etc.) and navigate to the page, post, or section where you want the widget to appear.
Common placements include the sidebar, footer, or homepage.
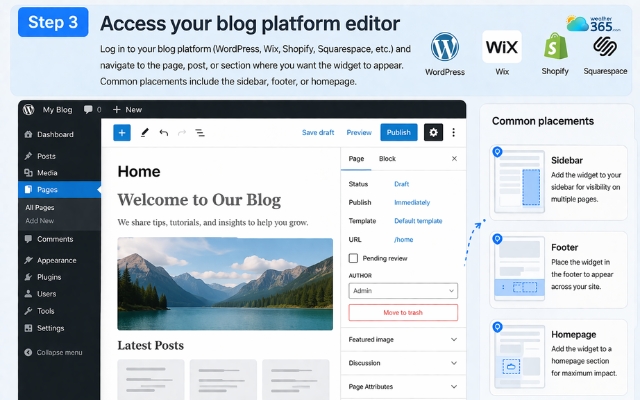
Go to your blog site
Step 4: Add an HTML block or widget area
Most platforms have a “Custom HTML” block or widget section.
Drag and drop this element into your layout, then paste the embed code you copied earlier.
This is where the widget gets integrated into your site.
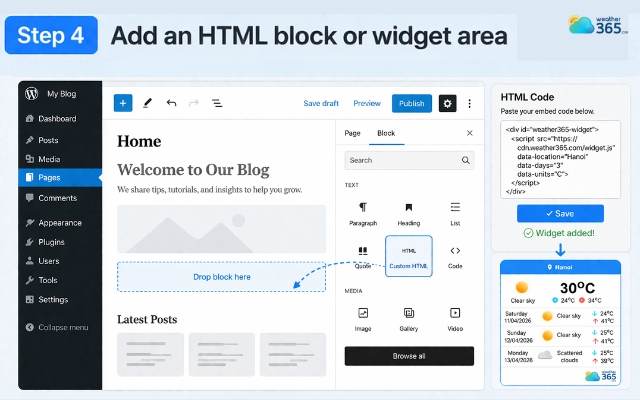
Create a block to paste the code
Step 5: Preview on mobile and desktop
Before publishing, switch between desktop and mobile views. A good weather widget should look clean and readable on all devices.
This step helps you avoid layout issues later.
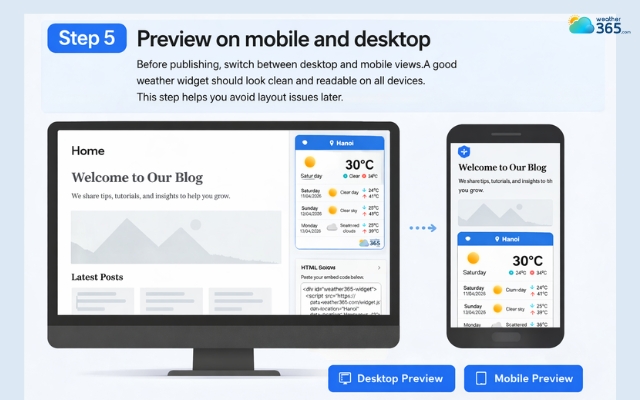
Do not forget to preview the widget
Step 6: Publish and go live
Once everything looks good, hit publish.
Your Weather365 widget is now live, and visitors can start seeing real-time weather updates directly on your blog.

Publish to see the result
Final Thought
Weather Widget for Blog Platforms is one of those small changes that adds real value over time. It helps your site feel more complete and user-friendly without extra effort. Ready to improve your blog experience? Go ahead and add it today.
Frequently Asked Questions (FAQs)
Related post

How to Add Weather Widget for WordPress? A Step-by-step Guide

How to Add Weather Widget to Any Platform? A Complete Guide for Beginners

0 Comment
Leave a comment
Your email address will not be published. Required fields are marked *