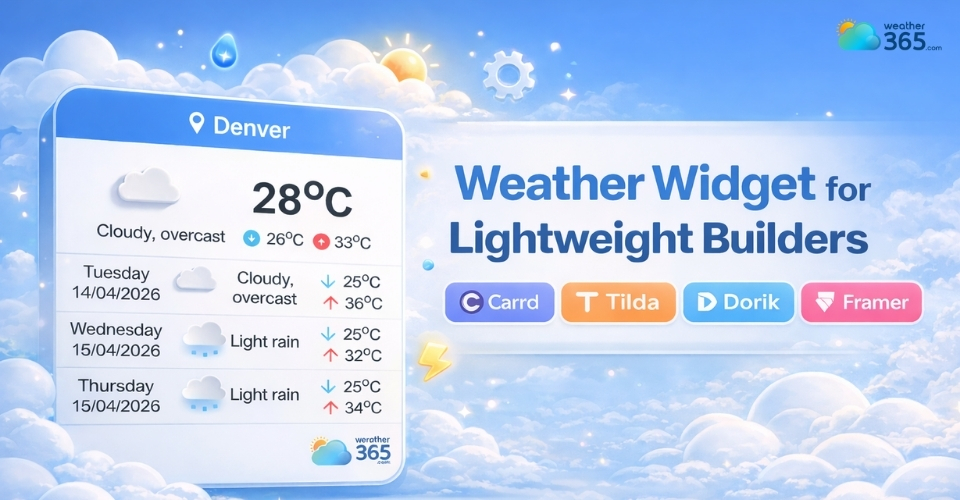
Weather Widget for Lightweight Builders: Adding Live Weather Easily
What if a weather widget for lightweight builders could add real-time value to your site without slowing it down? Many creators struggle to balance functionality and performance. Here, this guide will show you how to integrate weather data quickly while keeping your website fast, clean, and user-friendly.
Weather widget for lightweight builders
- About Weather365 widget
- Why Weather365 widget worth it?
- Why do your lightweight builders need a weather widget?
- How To Add a Weather Widget for Lightweight Builders
- Step 1: Generate your widget
- Step 2: Copy the embed code
- Step 3: Add an Embed or HTML element
- Step 4: Place the widget strategically
- Step 5: Preview on different devices
- Step 6: Publish your site
- Common Mistakes When Adding a Weather Widget
About Weather365 widget
In simple terms, Weather365 widget is an embed-based weather widget that lets you display real-time weather data directly on your website.
Instead of installing a heavy plugin or complex system, you just copy a small piece of code and paste it into your site.
That’s it: no complicated setup, no performance-heavy processes running in the background.
What makes it different is its focus on speed and simplicity. It’s built for websites that want useful functionality without sacrificing loading time.
This is why it fits perfectly with lightweight builders like static sites, minimal CMS platforms, or performance-focused page builders.
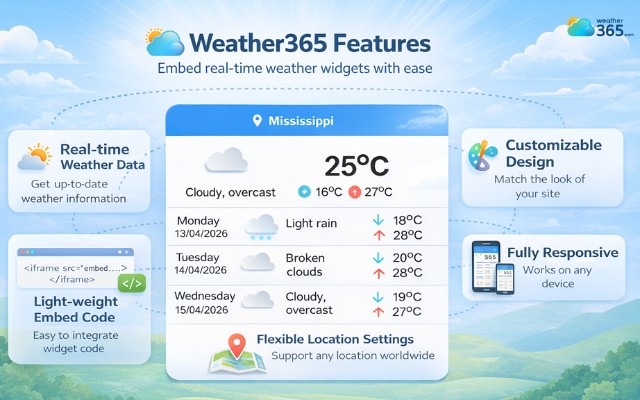
Why Weather365 widget worth it?
Do you know why the Weather365 widget is so popular on every website? Why is it the best weather widget for Blog Platforms? It’s mostly due to its unique features!
Real-time weather data
Weather365 pulls live weather information and updates it automatically.
This means your visitors always see accurate conditions without needing to refresh or leave your site.
Light-weight embed code
This is the biggest advantage.
The widget runs via a small external script, so it doesn’t overload your website like traditional plugins.
Customizable design
Weather365 gives you flexible control over how the widget looks and behaves.
You can choose different widget models, adjust temperature and precipitation units, set your preferred date format, and decide how many forecast days to display.
It also lets you fine-tune colors, from title and text to background, borders, and lines, so everything fits your site naturally.
This helps the widget blend naturally into your site instead of looking like a random add-on.
The Weather365 widget combines unlimited features
Flexible location settings
You can set a fixed location (like a business area) or allow dynamic location detection depending on your needs.
Fully responsive
Whether your visitors are on mobile or desktop, the widget adjusts automatically, no extra work required.
You may also like this: How to add a Weather Widget for Joomla & Drupal?
Why do your lightweight builders need a weather widget?
If you’re using a lightweight builder, every feature you add needs to justify its place.
A weather widget does exactly that: it delivers useful, real-time information without adding unnecessary complexity.

A weather widget can elevate your site without harming performance
First, it improves user experience in a very practical way. Visitors can quickly check the weather without leaving your site, which makes your content feel more helpful and complete.
This is especially valuable for local businesses, travel blogs, or event pages where the weather directly affects decisions.
Second, it helps increase engagement. Small, relevant features like this can keep users on your site a bit longer, reducing bounce rates in a natural, non-intrusive way.
Most importantly, with an embed-based solution, you get all these benefits without slowing down your site.
That’s the key reason why a weather widget fits so well into lightweight builders: it adds value while still respecting performance.
How To Add a Weather Widget for Lightweight Builders
How to add weather widget to any platform like Carrd, Tilda, Dorik, or Framer? It is straightforward because they all support embedded code.
Instead of installing plugins, you’ll simply paste a small HTML snippet, keeping everything fast and lightweight.
Step 1: Generate your widget
Start by creating your widget on a platform like Weather365.
Set your location, choose a suitable widget model, adjust temperature and precipitation units, and customize the design to match your website.
Once everything looks right, the system will generate an embed code for you.
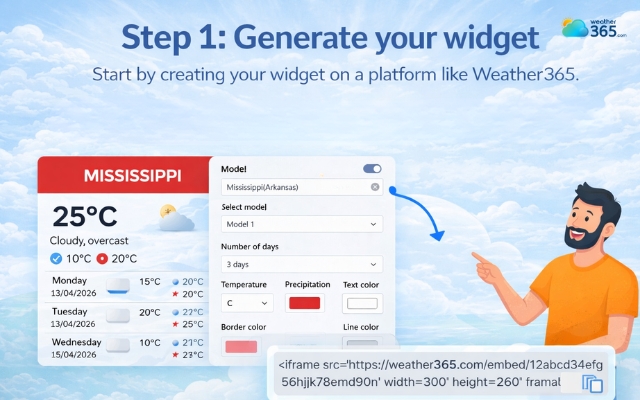
Customize and create your own weather widget
Step 2: Copy the embed code
After customizing, copy the HTML code provided. This code is optimized to be lightweight, which is ideal for performance-focused builders.
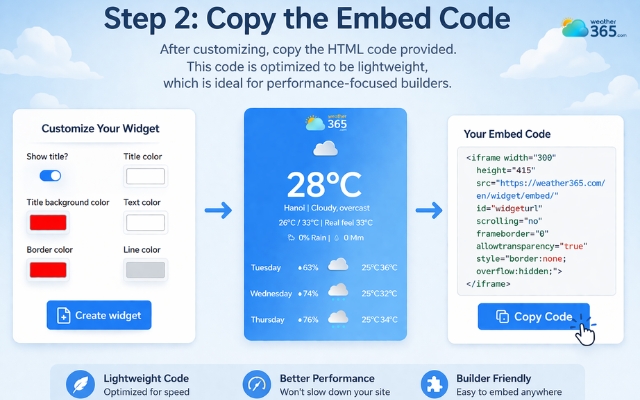
“Create widget” and copy the code
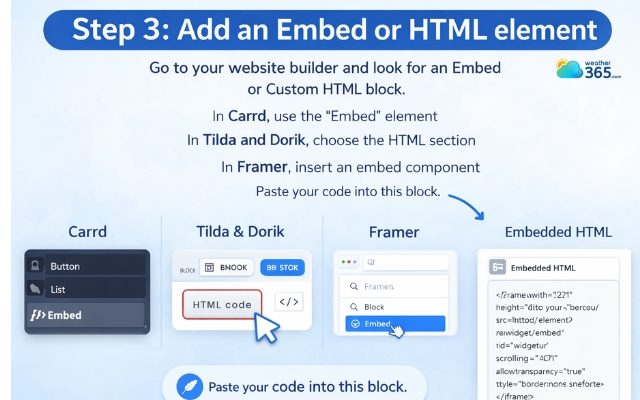
Step 3: Add an Embed or HTML element
Go to your website builder and look for an Embed or Custom HTML block.
In Carrd, use the “Embed” element
In Tilda and Dorik, choose the HTML section
In Framer, insert an embed component
Paste your code into this block.
Create a block to paste the code
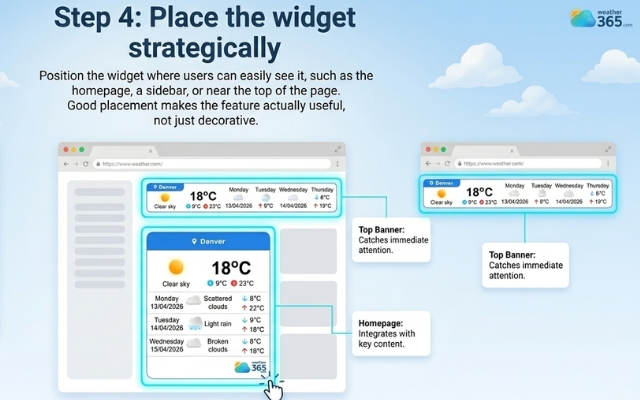
Step 4: Place the widget strategically
Position the widget where users can easily see it, such as the homepage, a sidebar, or near the top of the page.
Good placement makes the feature actually useful, not just decorative.
Choose a suitable position to place the weather
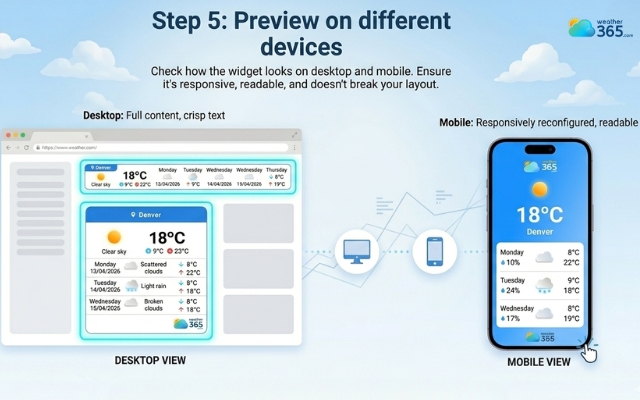
Step 5: Preview on different devices
Check how the widget looks on desktop and mobile. Make sure it’s responsive, readable, and doesn’t break your layout.
Check the widget on different devices
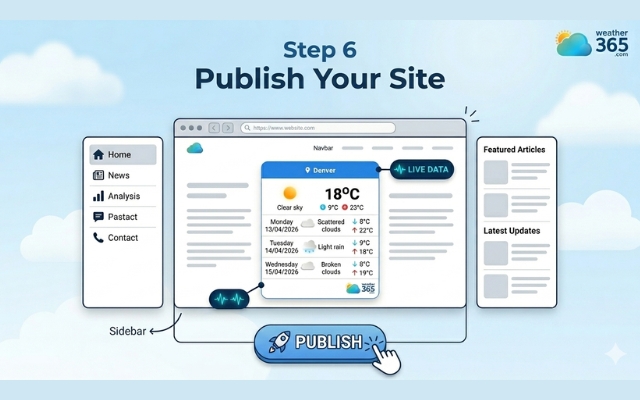
Step 6: Publish your site
Once everything looks right, publish your site.
Your weather widget will now display live data while keeping your website clean and fast.
Publish and enjoy the weather widget
Common Mistakes When Adding a Weather Widget
Adding a weather widget is simple, but a few common mistakes can reduce its effectiveness. Here are the ones to watch out for:
Using heavy plugins instead of embed code
Full plugins often load unnecessary scripts, which can slow down your site, especially on lightweight builders.
Poor placement on the page
If the widget is hidden or placed too low, users may never notice or use it.
Ignoring mobile responsiveness
A widget that looks fine on desktop can break on mobile, making the layout messy and hard to read.
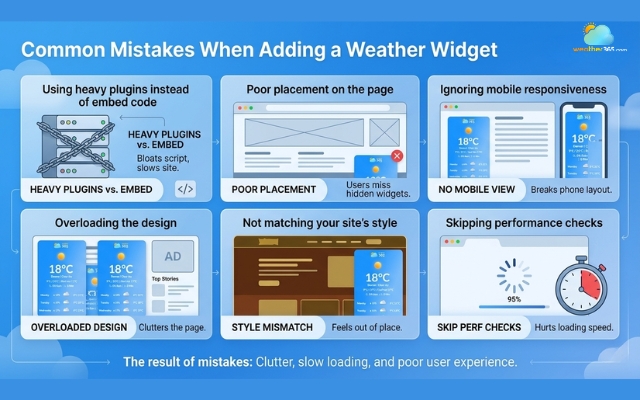
Avoid these mistakes when embed a weather widget
Overloading the design
Adding too much data or multiple widgets can clutter your page and distract users.
Not matching your site’s style
Mismatched colors or fonts make the widget feel out of place instead of integrated.
Skipping performance checks
Even small elements should be tested to ensure they don’t affect loading speed.
Keeping these points in mind helps your widget stay clean, useful, and aligned with your site’s performance goals.
Final Words
A well-integrated weather widget for lightweight builders can enhance your website without compromising performance. By choosing a lightweight solution like Weather365 and following best practices, you can deliver real-time value to users while keeping your site fast, clean, and user-friendly.
Frequently Asked Questions (FAQs)
Related post

Weather Widget for Squarespace: Quick Guide to Display A Live Weather

How to Add Weather Widget to Any Platform? A Complete Guide for Beginners

0 Comment
Leave a comment
Your email address will not be published. Required fields are marked *